The purpose of the document library is to make various documents, presentations and meeting notes available for viewing by designated groups of users.
The document library is accessed through the dashboard (see below).
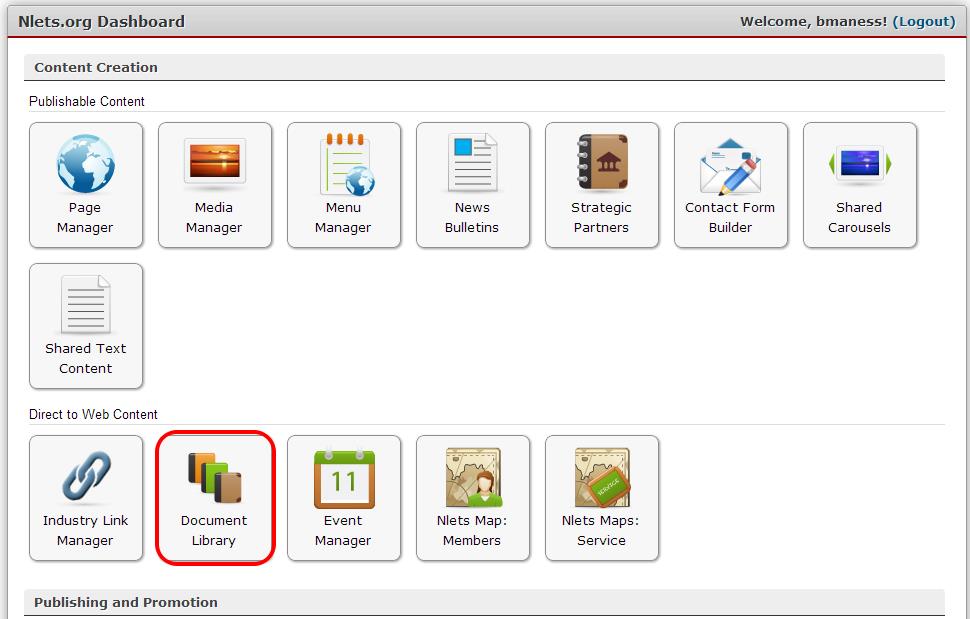
When you click on the Document Library button, you land upon the following module:

To add to the Document Library, refer to the Document Library module (see previous page), Click on “+ Add Document.” You will land on this page:
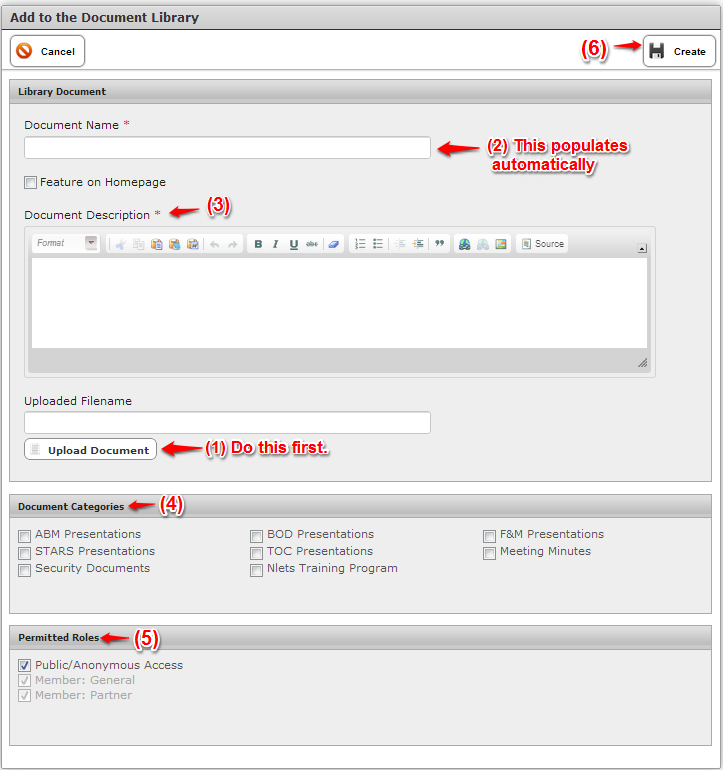
- Click “Upload Document” first.
- You will notice that the document name will automatically populate both the Uploaded Filename cell and the Document Name Cell.
- Next, enter your Document Description. This may be the title of the document.
- Document Categories – This is optional.
- Permitted Roles – Check the appropriate role.
- Click “Create” to save/add the document.
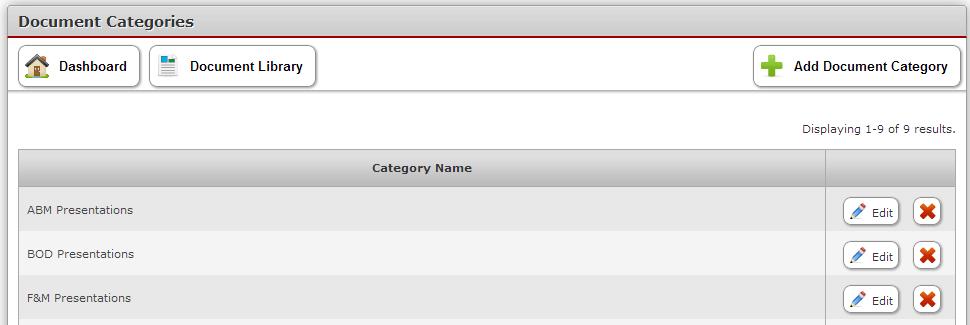
To add a New Document Category, from the Document Library module, click “Document Categories.”

You will land upon the following module. To add a new category, click “+ Add Document Category.”
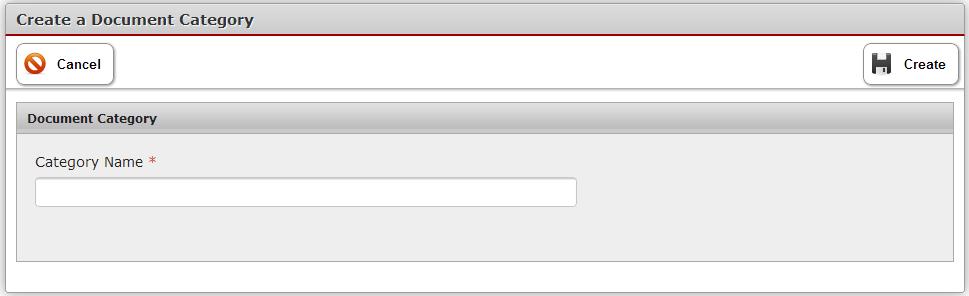
You will be presented with the following screen. Enter the Category Name in the cell provided and click “Create.”
To edit an existing category, click “Edit” on the same line as the category. You will be presented with a screen entitled “Update Document Category.” Make your change and click “Save.”