The purpose of the Shared Slideshows module is to create slideshows. The Shared Slideshows module contains various widgets; the purpose of sharing these widget types is to make them available for use on other areas of the website.
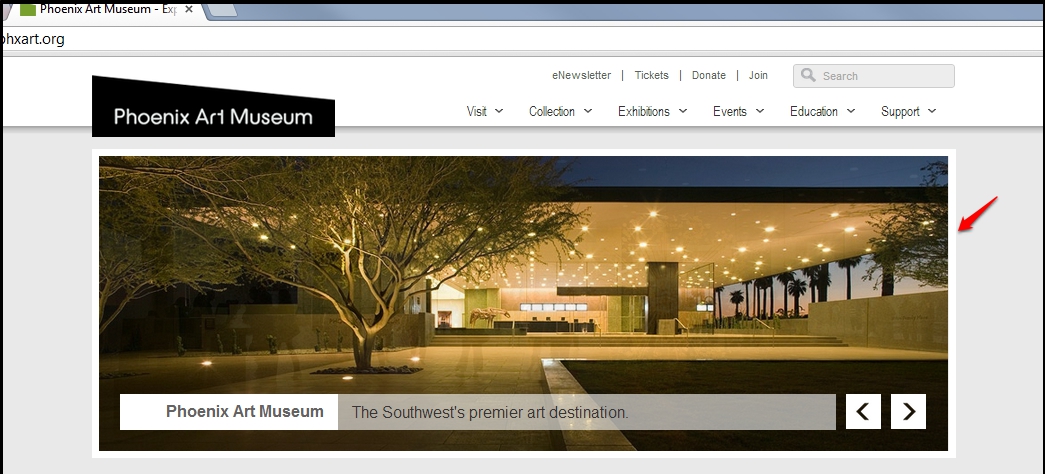
On the Phoenix Art website, this is what the slideshow looks like on the homepage. The images within the box annotated by the red arrow change every few seconds until it cycles through all the designated slides, then it starts over again.
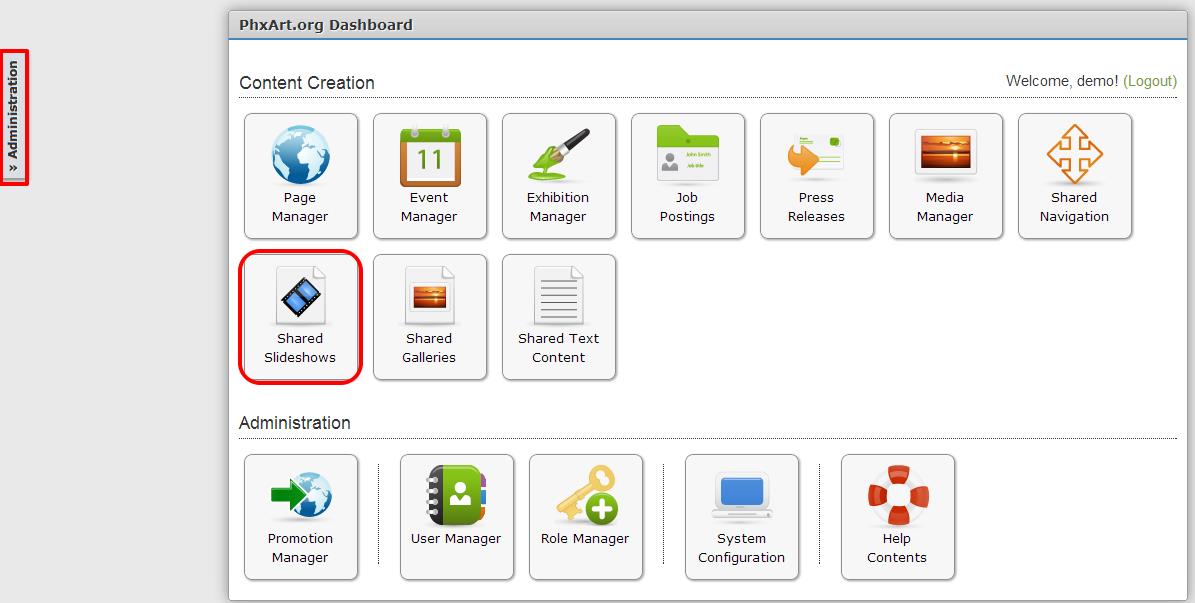
On the back end, there are two ways to access the “Shared Slideshows” module:
(1) By the Dashboard, via the “Shared Slideshows” button (as outlined in red below).
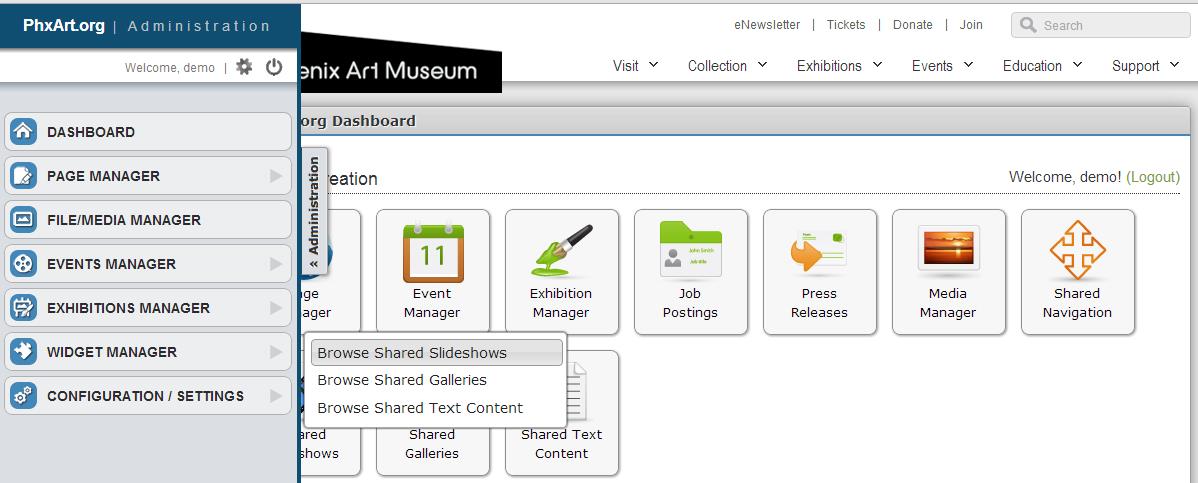
Or, (2) By clicking the Administration tab (outlined in red above). To access the “Widget Manager” button, you would mouse-over it and click on “Browse Shared Slideshows.” (see the following example):
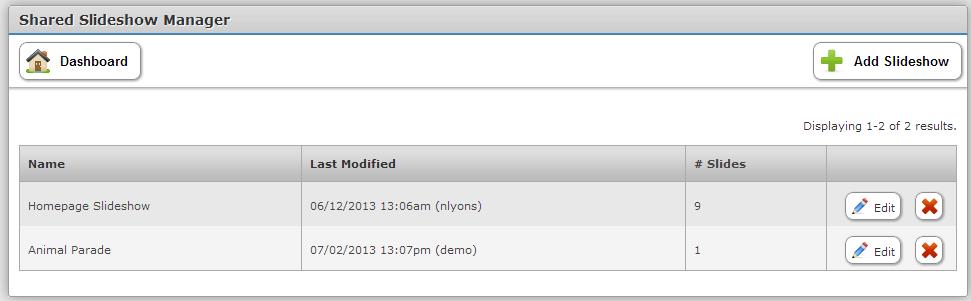
Using either of the above access methods will land you on the “Shared Slideshow Manager” (see the following example).
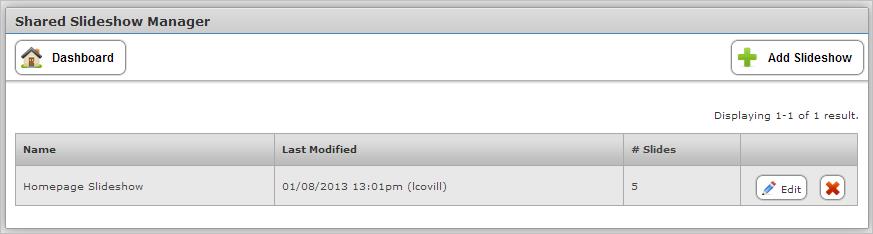
Note: Your own company’s website may have more than one slideshow.
How to Add a Slideshow
Click “+ Add Slideshow”. You will arrive on the following module: (Note: For demonstration purposes, we will name the slideshow “Animal Parade.”)
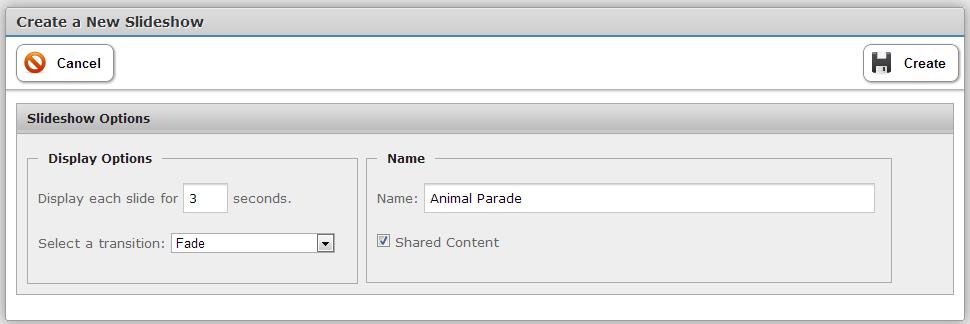
Select “Shared Content.” Click “Create”. You will then get the following screen:
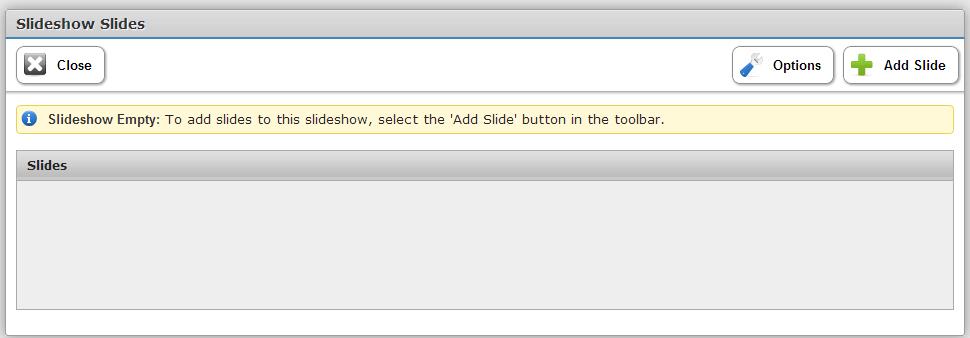
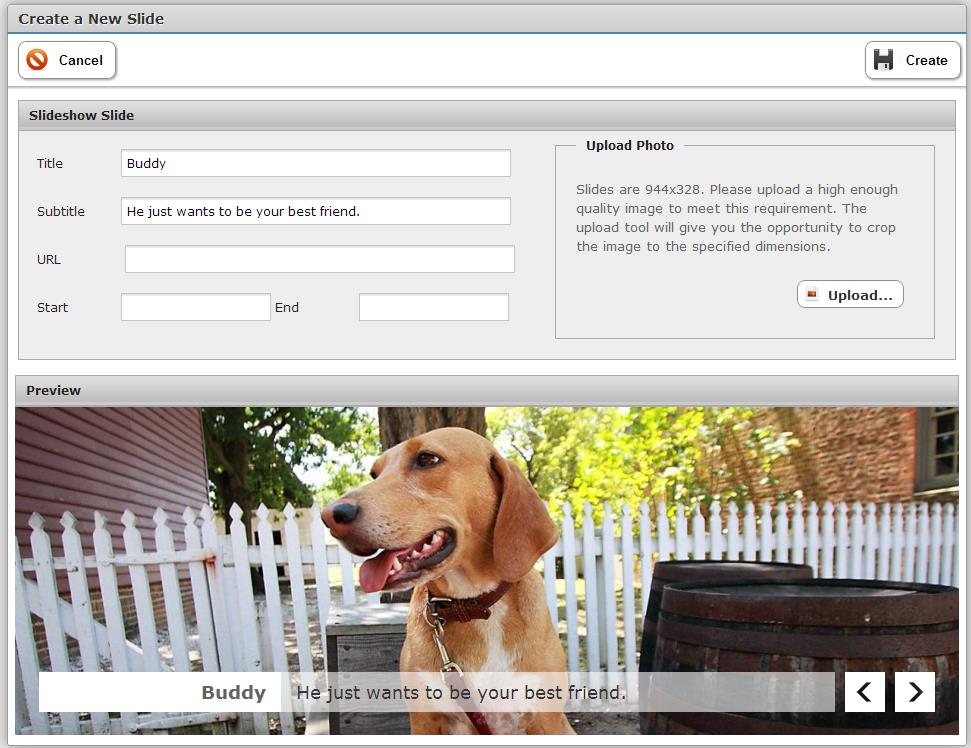
Click “+ Add Slide.” You will get the following screen. For demonstration purposes, we have added the title “Buddy” and the subtitle, “He just wants to be your best friend.”
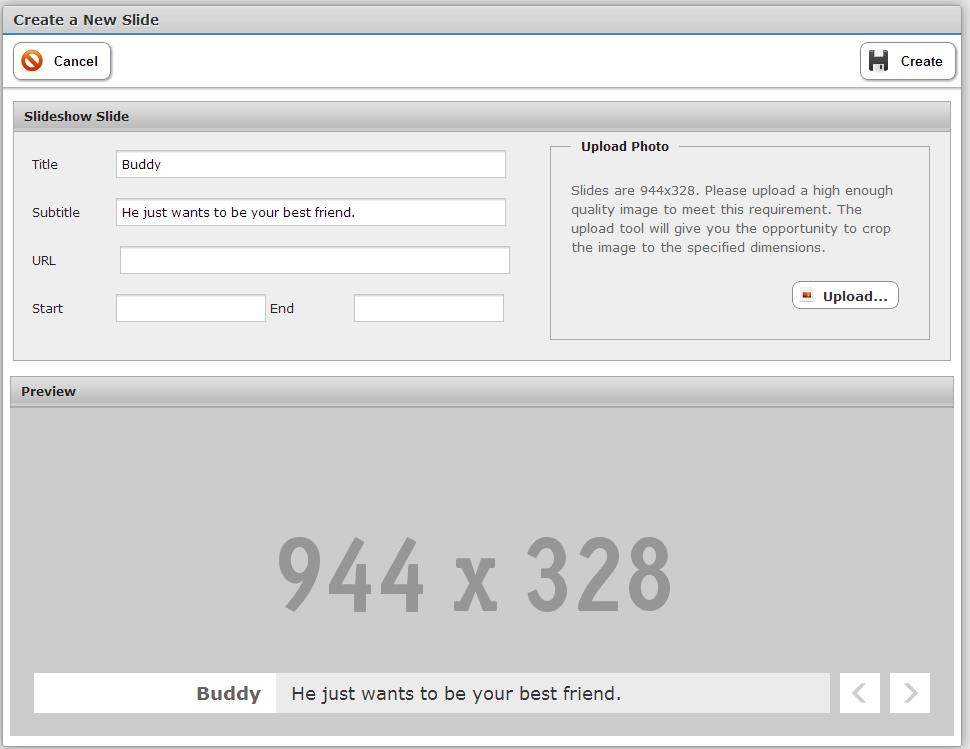
Next, click “Upload” You will get the following screen:
![]()
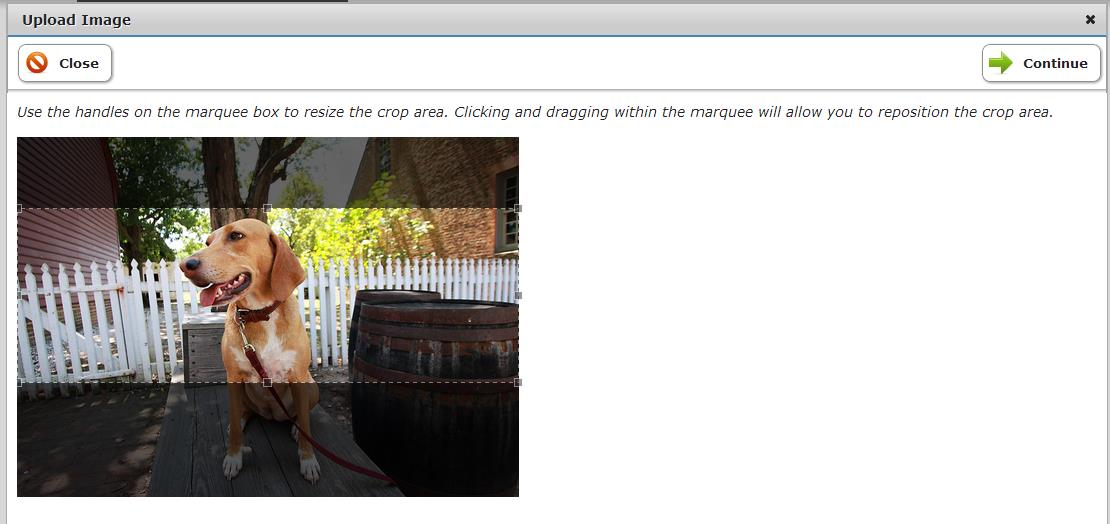
Click “+ Add file….”; select image from your files. You will be presented with the following screen, where you can crop your image.
Once you complete cropping/resize, click “→Continue .” The following image will appear:
Click “Create”. The following screen will be presented:
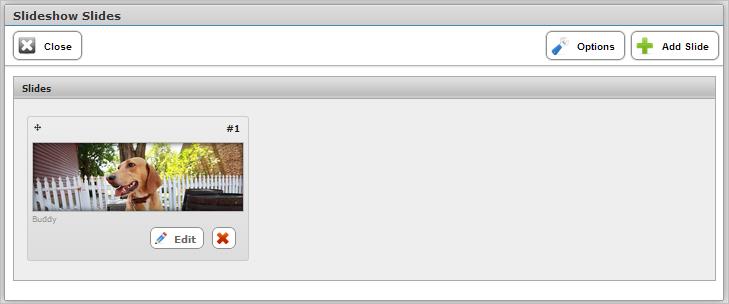
At this point, you may repeat this process by clicking “+ Add Slide”, or you can select “X Close” If you choose close, you will see the following screen:
You will see that the new slideshow, “Animal Parade,” has been created.
How to Edit a Slideshow
Click “Edit” on the line next to the slideshow” Homepage Slideshow.” The following screen will be presented.
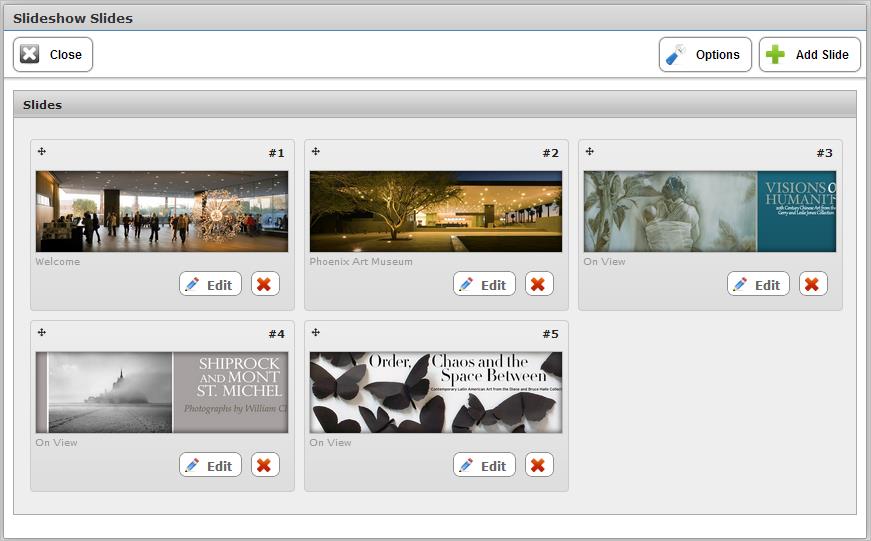
On the above module, it is possible to change the order of the slides by simply dragging them into the order you desire.
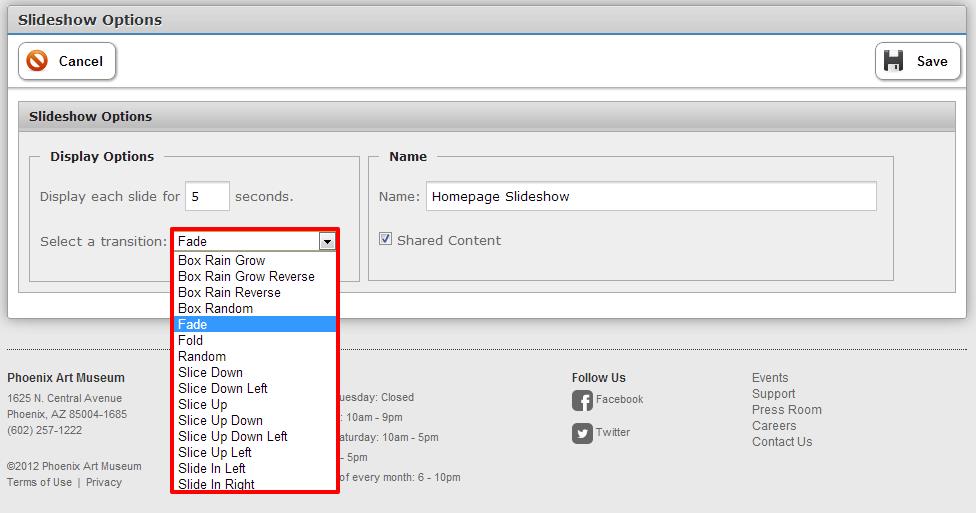
By selecting “Options”, a new screen opens up (see example below).
It is possible to (1) Change the number of seconds each slide will display (b) select the transition (a drop down menu offers various options, see below), and (c) Select or Unselect shared content. Click “Save” to save any changes.
There is an Update Slide module for each slide within the slideshow (the following is an example of only one).
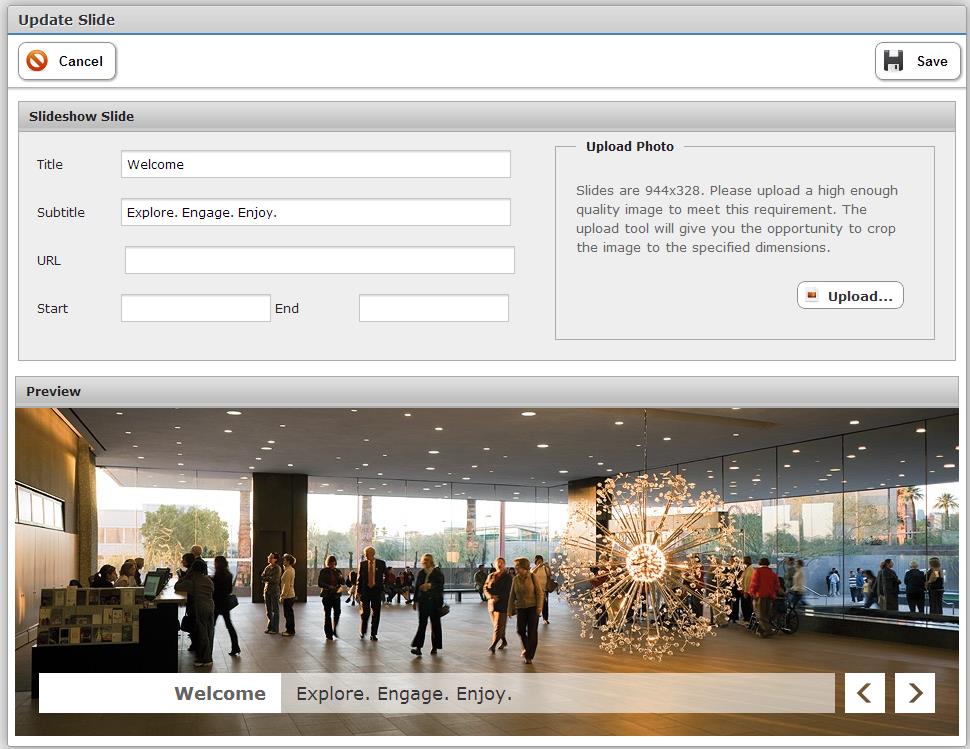
Edit the slide and click “Save.”