Frequently Asked Questions

Question:  What does CMS stand for?

Answer: It means Content Management System.  Content refers to any files and information that makes up your website or back end. “Management” refers to the Back End; this includes both the dashboard and administration tab.  “System” means that the content or resources are managed a systematic way so they are mutually usable by company-authorized users.


Question:  What is the Back-End? 

Answer:  This means the Dashboard or The Administration panel, where your company manages its site and content. It is restricted to users who have the “Access Administration panel” permission.


Question:  What is Front-end?

Answer:  The front-end is the part of a website that is accessible to the public; e.g. regular and anonymous users. In other words, it’s the public-facing part of your website.


Question:  What is the relationship/difference between the User Manager and the Role Manager functions?

Answer:  User Manager maintains users and logins of CMS, whereas Role Manager manages roles of the users.  The definition within a role gives the user rights to do things like add photos, modify certain modules, add new pages, and so forth.  Roles will vary from company to company.  The role structure looks somewhat like a company organizational chart, except the roles are for the functions the user is allowed access rather than a job description, as it would be with the Role.


Question:  What is the System Configuration button on the dashboard for?

Answer:  This is configuration changes.  Most likely your company’s System Administrator or Web Master will be responsible for any updates.


Question:  What if the calendar does not update after I add a new event?

Answer:  You can make this happen immediately by clicking “refresh” symbol  on your browser.


Question:  Where can I access the CMS User Guide?

Answer:   Go to the Dashboard and click the “Help” button.


Question:  What is a WYSIWYG editor how does it relate to my company’s CMS?

Answer:  The acronym “WYSIWYG” means “what you see is what you get,” In your company’s CMS, there is a built-in html text editor (or WYSIWYG editor) that makes it possible to enter your text content into a specialized module that has all the typical word processing features.  This html text editor automatically converts your text content to html; however, the person entering the text content views this text content input as it would appear on the front-end web page.
Maps:Members

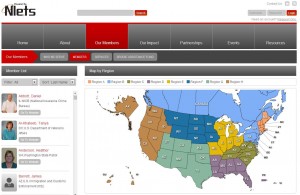
The Member Map module is used to add/import members.  The front-end result is a map that displays a regionalized color-coded map, coupled with a sidebar that has a sort function so you can view the photos and profiles members for the selected region (See the following example).

MapsMem6

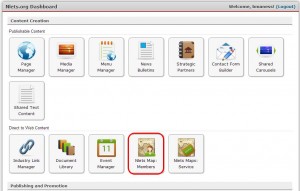
On the back end, the Nlets Map: Members module can be accessed by clicking on the dashboard (see below).

MapsMem1

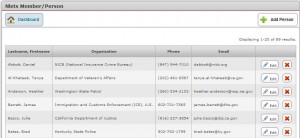
You will land on the following screen (example shows a partial screen):

 MapsMem2

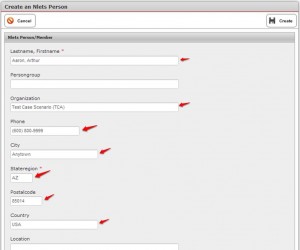
To Add a New Member/Person

click “+ Add Person.”  You will land upon the following screen (see next page for a completed test example.  Note:  The red asterisk (*) means that the information in that cell must be completed in order to create the new member.

MapsMem3

After completing the Create an Nlets Person module, click “Create.”

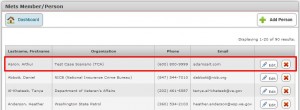
You will land on the following module.  Note that the new person has been added.

MapsMem4

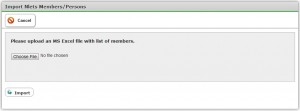
To Import a Member

Click “Import Members”

Mapmem9


When this screen opens, click “Choose file” and “Import.”

MapMem7

To Edit an Existing Member/Person

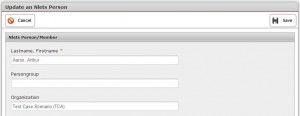
Click “Edit” on the line that you need to edit. You will be taken to the following module, where you would make your change and click the “Save” button.  Or, if you change your mind about the change, you may click the “Cancel” button and you will be returned to the Nlets Member/Person module.

MapsMem5

To delete a member/person, click the red “X” on the right-hand side of the Nlets Member/Person module.


Maps:Service

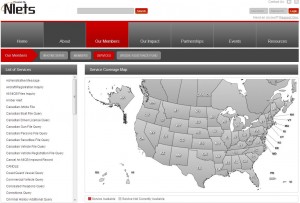
The front-end webpage for “Our Members/Services” contains a feature which allows the user to view which services are available for what regions by simply clicking one of the items on the list of services.  The “Service Available” results appear on the map as red coloration.

Mapserv1

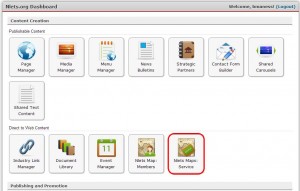
On the Nlets Dashboard, you may access the back-end application by clicking the Nlets Maps: Service button (see below).

Mapserv2

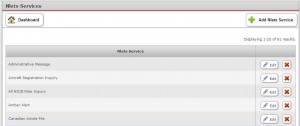
You will land upon the Nlets Services module.

Mapserv3

To add an Nlets service, click+ Add Nlets Service” button on the Nlets Service module.

Mapserv4

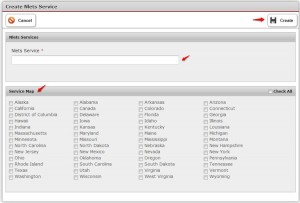
You will land upon the “Create Nlets Service” module.  Complete the Nlets Service cell and check the appropriate items on the Service Map listing, then click “Create.”

Mapserv5

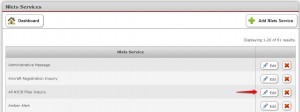
To edit an existing service, click “Edit” (See below).

Mapserv6

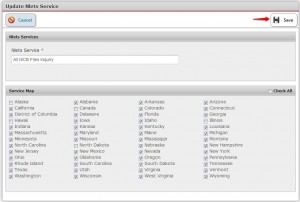
The “Update Nlets Service” module will open up.  Once you have made your changes, click “Save.”

Mapserv7

To delete a service, click “X” on the Nlets Service module.

To cancel and return to the former module, click “x Cancel.”

To return to your Nlets Dashboard, click the “Dashboard” button.


Administration Tab

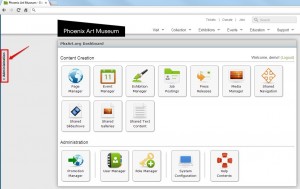
The Administration tab is located on the left-hand side of any page while logged in.

DashAdmintab

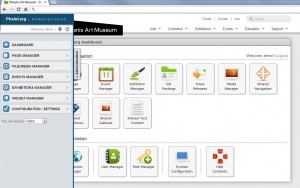
When you click the Administration tab, the following module opens up:

Admintabopen

This Administration module offers shortcuts to the tools most frequently used.  These functions will be described within their own posts.

The Dashboard

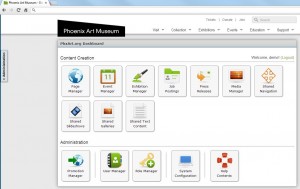
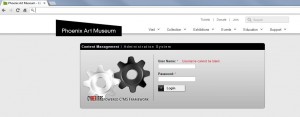
The Dashboard is the center of all activity on the back-end of your website.  After logging in to C2MS, you will land upon the Dashboard.  You can also be brought back to this page by clicking the Dashboard button on the initial page for each tool or the Administration Tab.

It is important to understand that your company’s Dashboard and Administration Tab will most likely differ from the one discussed in this manual.  Another factor that affects what is displayed on the Dashboard/Administrative Tab is to which modules the user has access to; e.g. if the user has not been granted access to a module within the Role Management function, the button for that module will not display on the Dashboard.

The Dashboard gives you the ability to manage all the functions available on your company’s website. These functions can be accessed from this page by simply clicking on the module you need to edit or by using the Administration Tab.

Dashboard