Job Postings

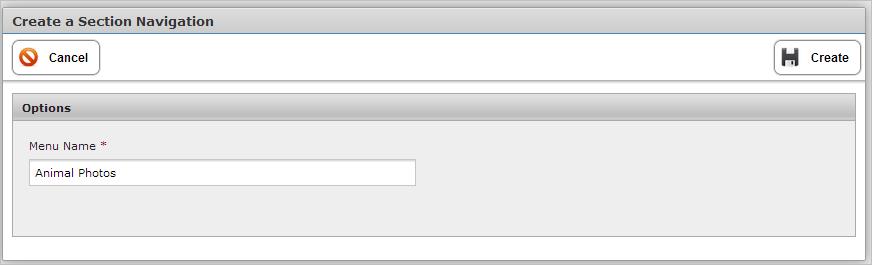
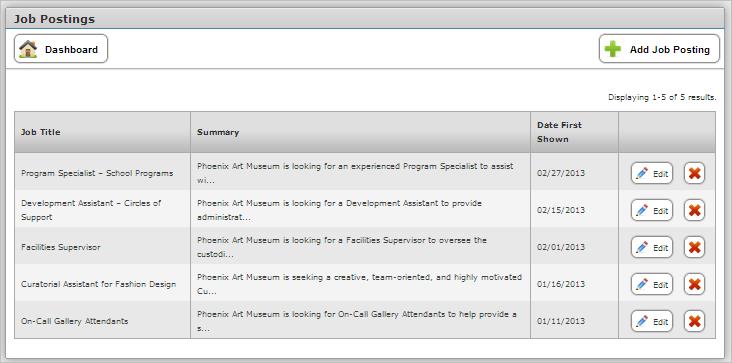
The Job Postings module gives you the ability to add a job posting to be displayed to to public users on the website.  Also, you can schedule the date that you want the posting to appear on the website.  A job posting in PDF format can be uploaded with the touch of a button.

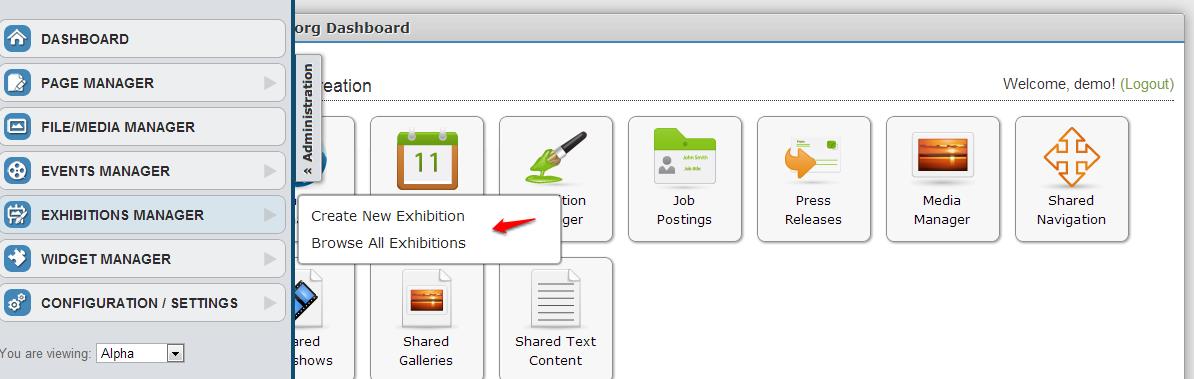
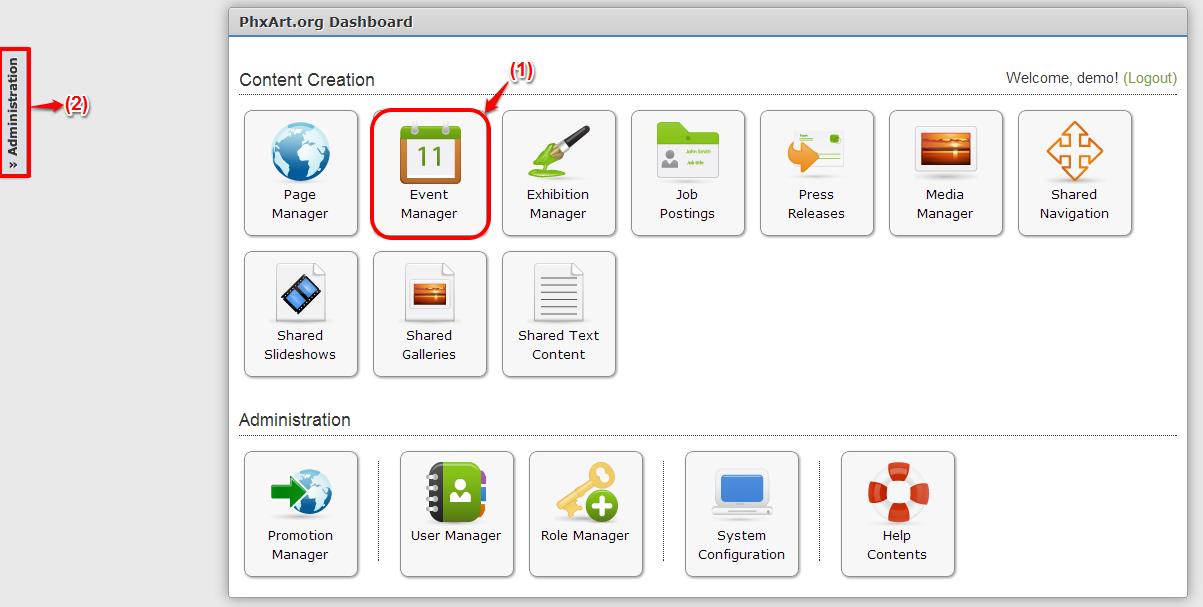
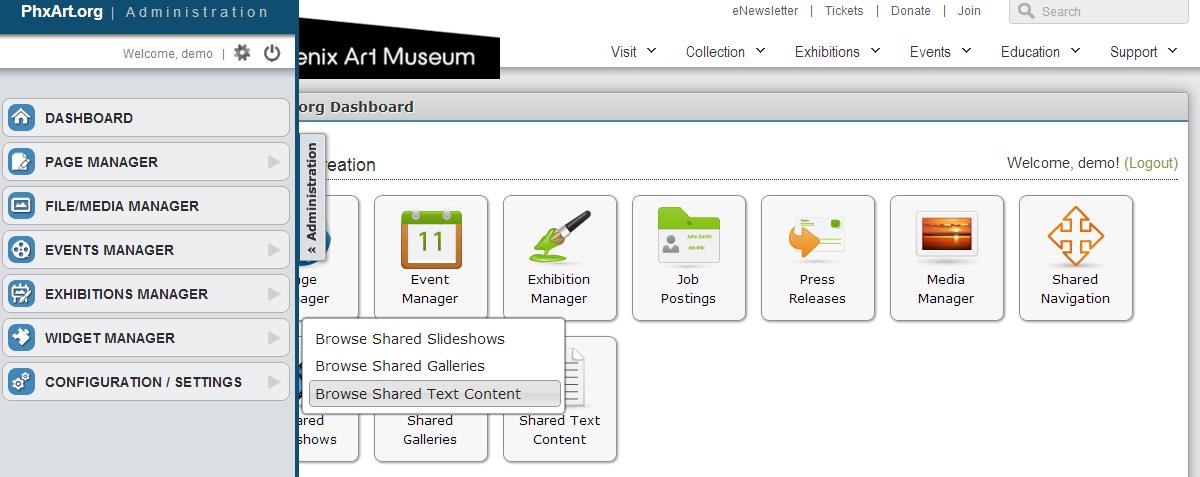
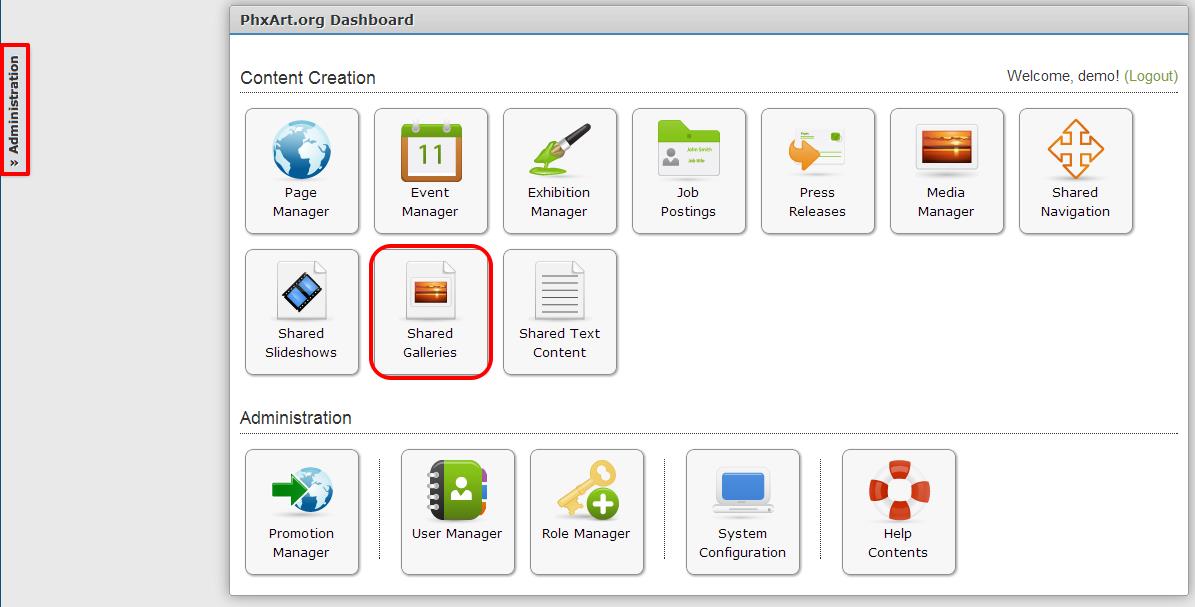
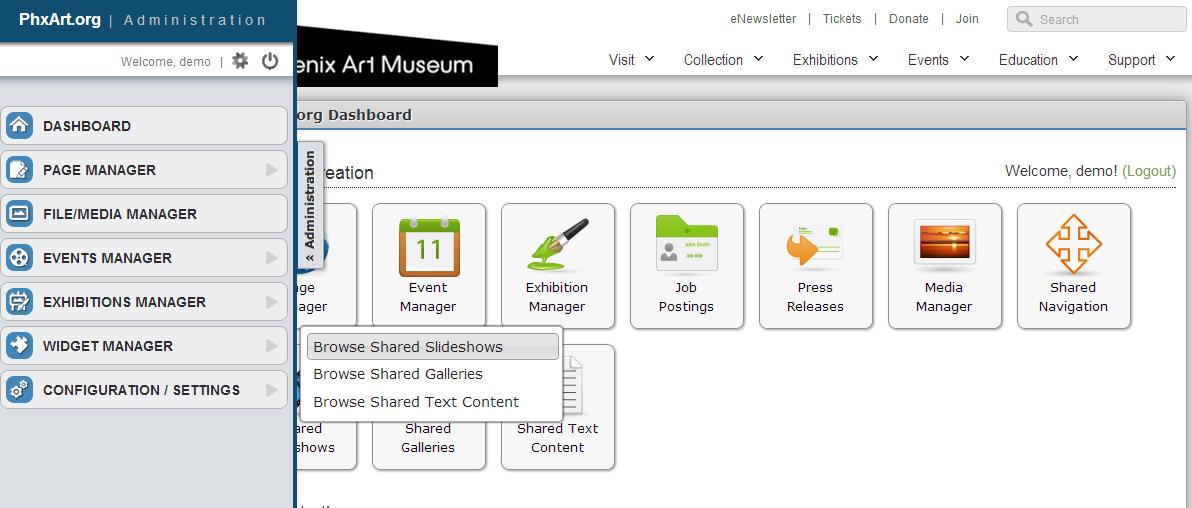
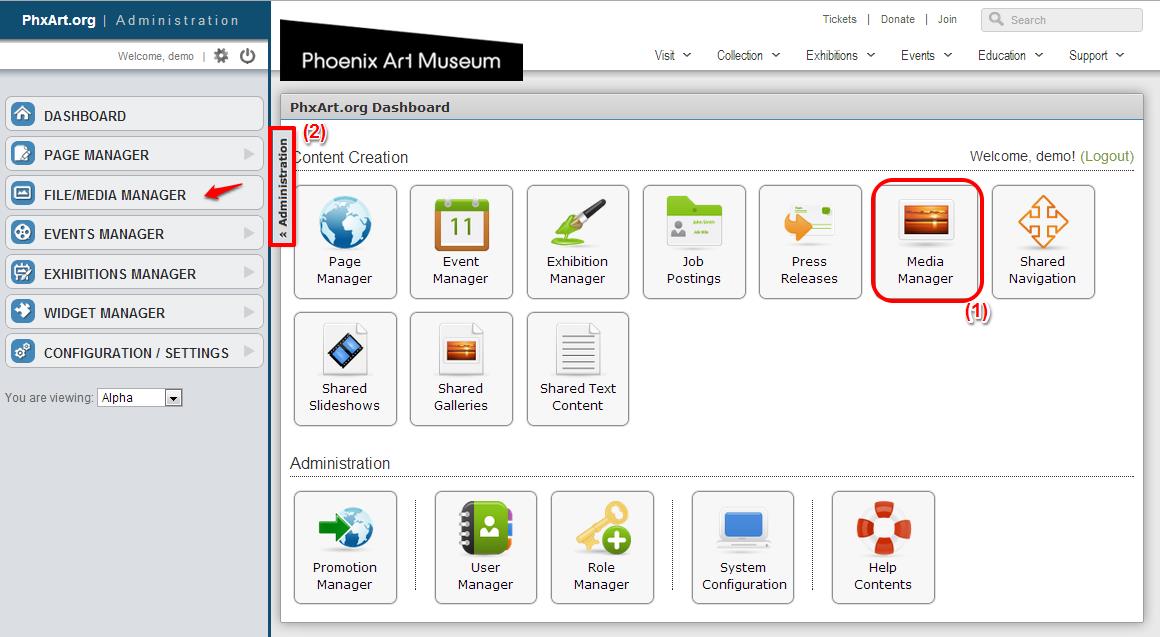
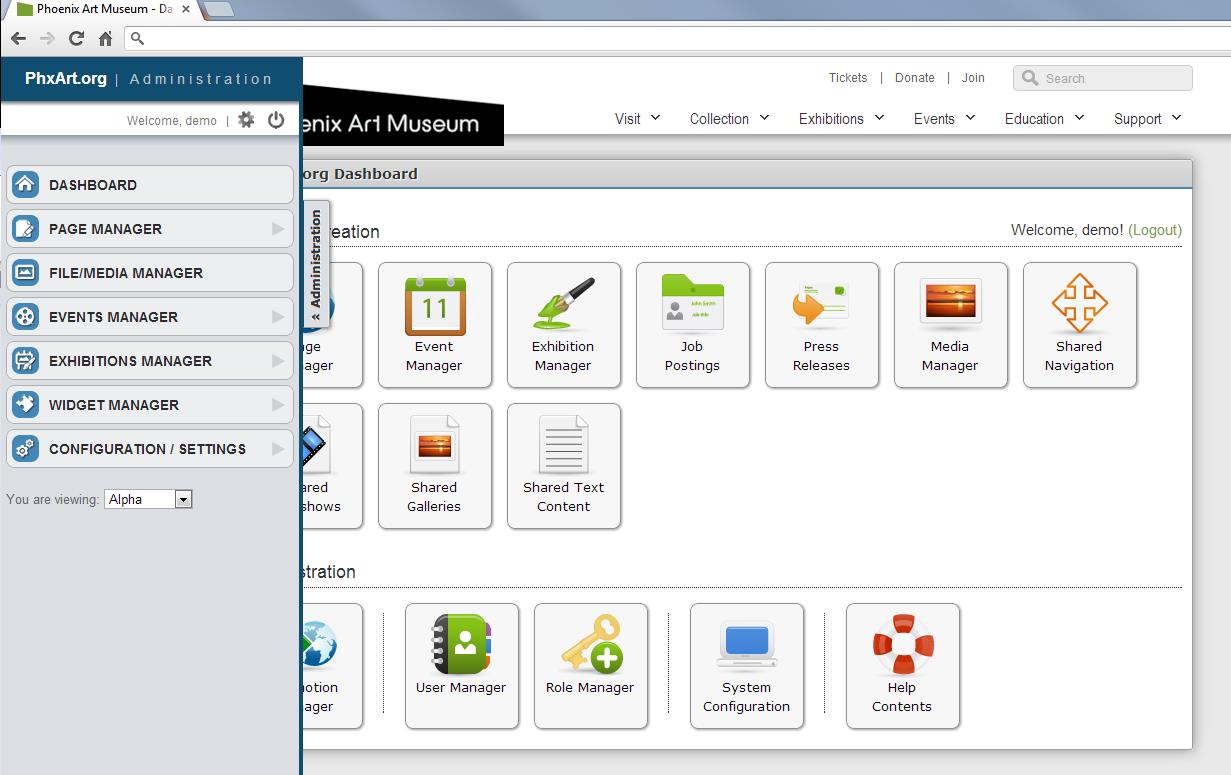
To access Job Postings, click on “Job Postings” on the Dashboard (outlined in red in this example).

Jobpost1

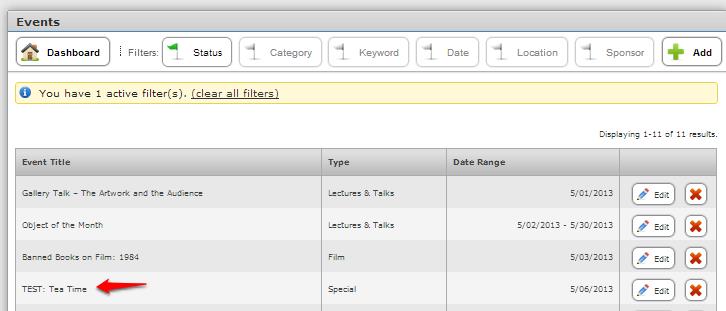
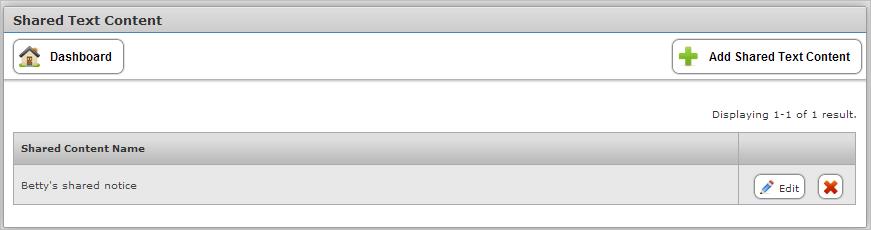
The following “Job Postings” module will be presented:

Jobpost2

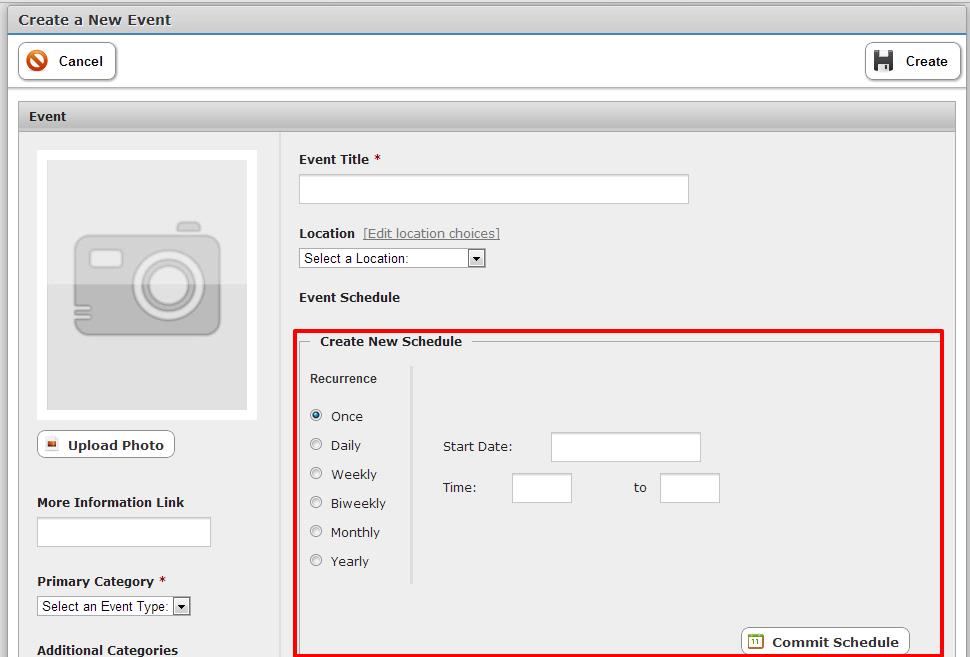
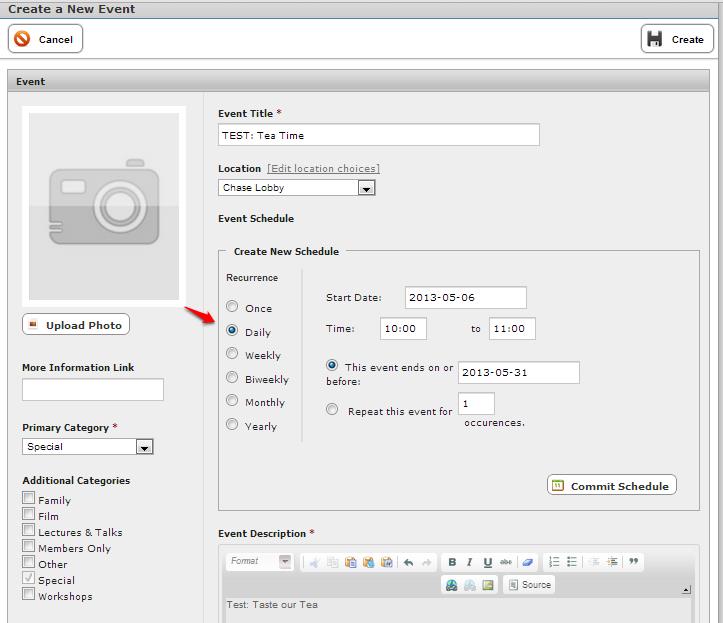
 How to Add a New Job Posting

Jobpost3

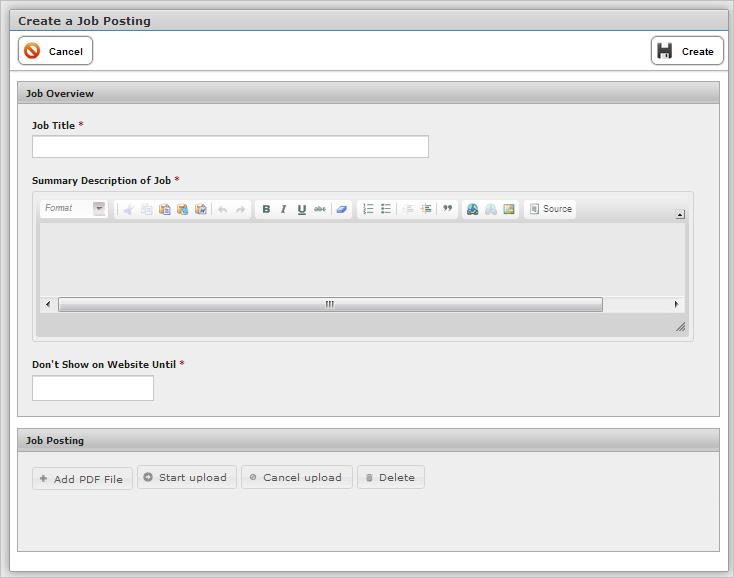
  • Enter the Job Title.*
  • Enter summary description.*
  • In “Don’t Show on Website Until” cell, there is a calendar drop-down.  Select desired date.*
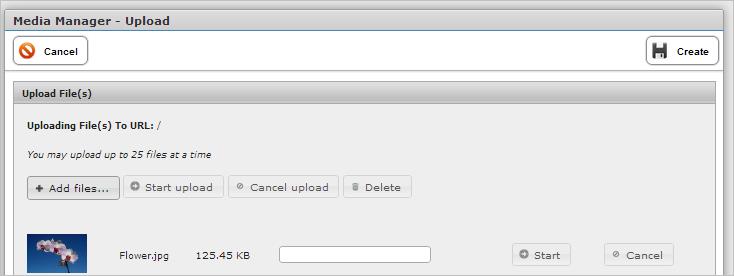
  • Select “Add PDF File” button.
  • Select file to upload
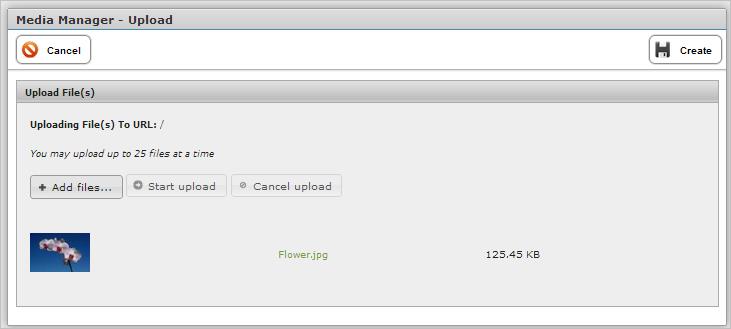
  • Click “Start upload”
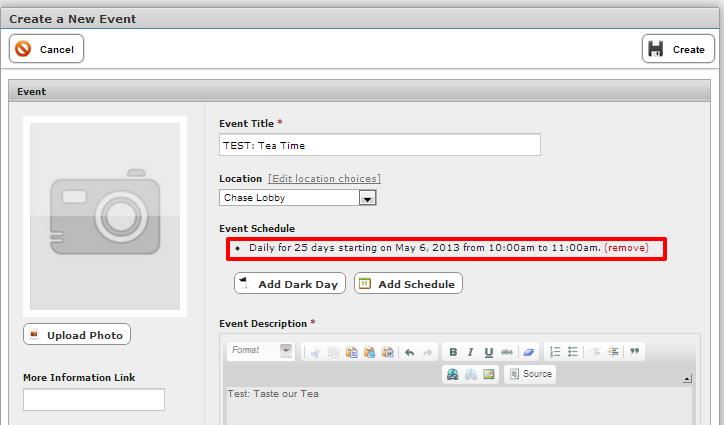
  • Click Create.

*Please note that anything marked with a red “*” on the above module must be completed in order to create a job posting.

Jobpost4

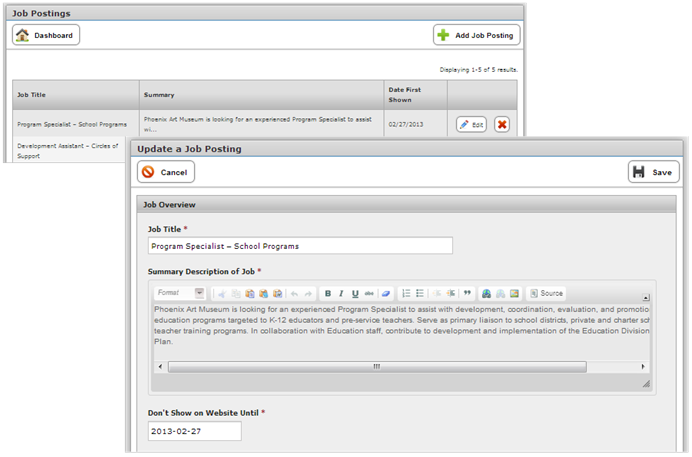
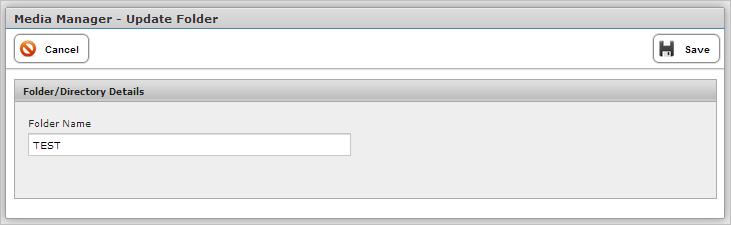
How to Edit a Job Posting

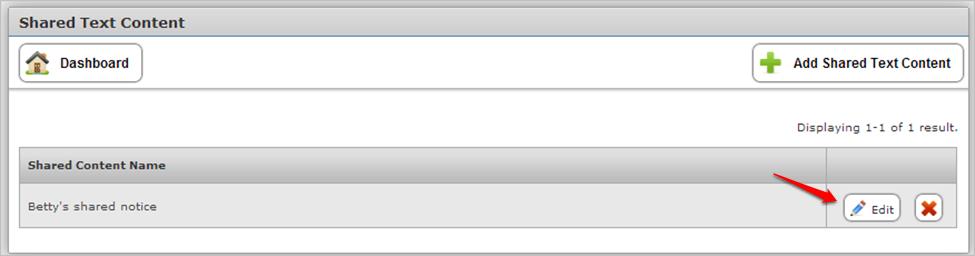
On “Job Postings” module, click “Edit” button for the job posting you need to change.

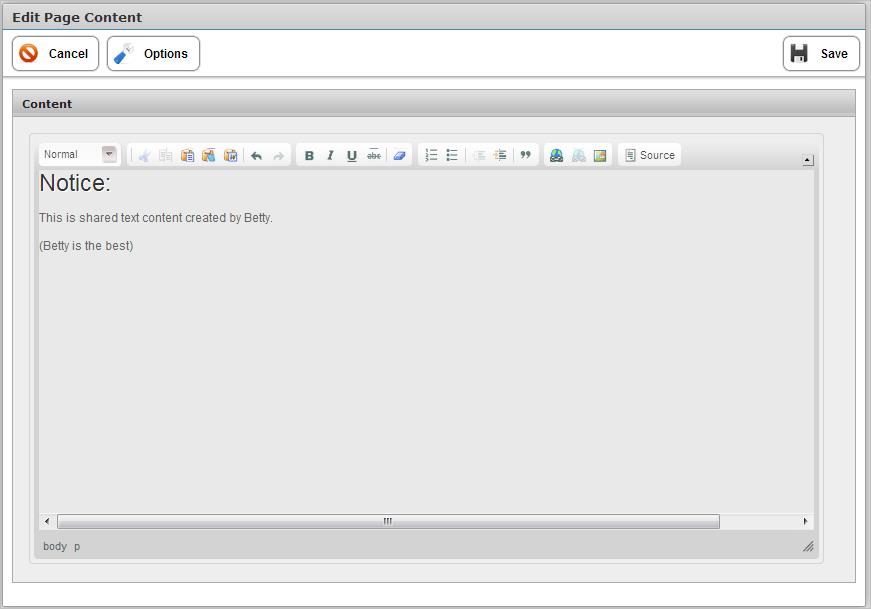
  • A screen called “Update a Job Posting” will open up.
  • Make all necessary changes, click “save”.

Exhibition Manager

The Exhibition Manager module allows you to manage exhibitions text, photos and schedule for publication on various pages of the website.

The “Exhibitions Manager” button opens up the following option list:

Exhibmgr2

The following “Exhibitions” module will open up.

Exhibmgr3

To add an exhibition, click the “+ Add Exhibition” button.  The “Create an Exhibition” module will open up. (See the following example).

For discussion purposes, the following module will be broken down and explained in three separate sections:

Part 1: Create an Exhibition (bordered in purple)

Part 2: Exhibition Information (bordered in yellow)

Part 3: Exhibition List View Image (bordered in blue)

Exhibmgr4


How to Create an Exhibition

Part 1: Create an Exhibition

  • Type in the title; press “tab”.  The title will preview in the Title Display Preview box.   This is how it will display on the actual web page.
  • Enter Subtitle (this is optional)

Exhibmgr5

  • Click “Meta-data”.  You will be presented with this sub-module.

Exhibmgr6

  • Enter URL and click Create.

Part 2: Exhibition Information

  • Location – this is where the Exhibition will be held.
  • Start Date and End Date calendars – Use the arrow keys to go to the month of the event you are creating.  Click on the dates of the event.
  • Click in the Overview box.  Enter a description of the event.
  • Associate this Exhibition with these Collections – use checkbox(es) to select collection where exhibit will appear on the webpage.

Exhibmgr7

Part 3:  Exhibition List View Image

  • Click “Upload Image.”

Exhibmgr8

  • You will be presented with this sub-module.  Click “Add File” to access your files or “Library” to view the Media Library.

Exhibmgr9

  • Exhibition List View Image – Select desired layout.  Click “Upload Image”.   The following is a screenshot of a completed module with images uploaded and format selected.

Exhibmgr10

  • Finally, go to the top of the “Create a Exhibition” module.  Click “Create.”

Exhibmgr11 

How to Edit an Existing Exhibition

  • On “Exhibitions” module, click “Edit” for the exhibition you wish to edit.

Exhibmgr12

  • You will be presented with “Update Exhibition” page.
  • After editing (See added text, outlined with red box) click “Save.”  You will be returned to the “Exhibitions” Page.

Exhibmgr11

On the front-end, this change should appear on the American Collection and the Photography Collection pages.

Event Manager

Event Manager allows you to manage your corporate evens with timed event postings that can be scheduled for inclusion on the site at a specific time.   Events are are automatically added to the Event module display widget which automatically categorizes them for display in either chronological order or by content category.

To access Event Manager, you have two options.

(1) You may click on the Event Manager module on the Dashboard as shown below:

Eventmgr1

(2) You may access Event functions using the Administration tab  (outlined with a red box above).  By clicking on the “Administration” tab, you are presented with the following menu listing.

By mouse-hovering Events Manger, you get a submenu to the right of the button where you can choose either “Create New Event” or “Browse all Events.”

Eventmgr2

On the Events Manager (aka Events) module, the following functions can be performed:

Eventmgr3redo 

  1. Add New Event
  2. Sort using “Filter” buttons
  3. Clear all filters
  4. Edit a specific event
  5. Delete a specific event
  6. Go to other pages
  7. Return to Dashboard 

 How to Create a New Event

Click “+ Add” button on the “Events” Module.  You will get the following screen: (See numerated explanations on the following pages).

Eventmgr4

1.         In the Event Title cell, enter your title.

2.         Under Location, select the location from the drop-down menu.

3.         Under Event Schedule, choose the recurrence (the number of times the event occurs). Note: (See Page 29 for Explanation of Recurrence.)

4.         Enter Start Date. Click in the cell, a calendar will drop down.  Repeat this process for End Date. (See the following Example of calendar drop-down)

Eventmgr5

5.         Enter Times.   A time chart with the times will drop down; click on the desired time; click done.

Eventmgr6

6.         Commit Schedule. Once you enter start date and times, click the “Commit Schedule” button.

7.         Event Description: This is where you would type an event description.  Note that it has many of the same editing features as a word processing program.  This cell must be completed.

8.         Uploading Images:  Using “Upload Photo” button on the Event module, access desired photo.  This sub-module will appear.  You have the option to add image file(s) or access the site’s Media Library.

Eventmgr7

9.         Calendar Description.  This area is meant to display brief text descriptions that will appear on the calendar.

10.      “Presented by”: This is to enter a sponsor’s name to appear to the public on the Event page.

11.      Main Sponsors: When selected, this button brings up a page containing a list of sponsors.  To select one of the sponsors to appear to the public on the front end page for a particular event, click the check box; click “Save”.

Eventmgr8

12.      To add a sponsor, click “Add Sponsor”.  Another sub-screen will appear.   Enter information and press “Save.” Select Supporting Sponsors: This requires following the same steps as with the “Add Sponsor” option.

Eventmgr9

13.      More Information LinkThis cell offers you the option to add a link to files or sites to provide information for access by the front-end web page user.

14.      Primary Category – This category contains a drop-down of categories.  (see the following example from Event module).  *Note: you must select from this menu before choosing from the additional categories.

Eventmgr10

15.      Additional Categories – This allows you to show the Event in other categories in addition to the primary category.  Click on the checkbox to select an additional category or categories (See the following example from Event module).

Eventmgr11

(a) Drop down that lists types of admission to an event (see the following example from Event module).

Eventmgr12

(b) [Edit admission choices] : This is a link that allows you to access the “Manage Admission Types” submenu.  To add a new admission choice, click “Add”, type in new admission choice, then click “Save” button. To delete an admission type, open the admission type and click the X Delete button.

Eventmgr13                             Eventmgr14

17.      Audience.  There are two options:

(a) Drop down that lists types of audiences to an event; (see the following example)

Eventmgr12

(b) [Edit audience choices] link which allows you to access the “Manage Audience Types” submenu.  To add a new Audience choice, click “Add”, and another submenu is presented.  Type in new Audience choice, then click “Save” button.  To delete an audience type, open the audience type and click the X Delete button.Eventmgr16                               Eventmgr17

18.      Purchase Online – The purpose is to make available to front-end web site user a link for purchase of tickets for events on the relevant event page.

Eventmgr18

19.      When you have completed all information on “Create a New Event” module, click “Create”.


How to Edit an Existing Event

From Dashboard or Administration Tab, click “Event Manager.”  You will land on this page.  For our example, we demonstrate an edit “Christmas in July.”

Eventmgr19

The added text can be seen next to the red arrow.  Next, you would click “Save.”

Eventmgr20

To view the change on the front end, click Events on Top Navigation and click “Family”:

Eventmgr21

These screenshots show that the change has been made on the both the Family page and the Members only page.

Eventmgr22

 Explanation of Recurring Events

Eventmgr24

On the “Create a New Event,” you have the option to choose the recurrence; that is, the number of times you want to repeat the event on the calendar.

If you select “Once” (see above) on the radio button selections, the event would occur once and would be posted on the calendar page.


To Create a Recurrence for Daily

See the following test example of daily recurrence.

Eventmgr25

After completing all items on “TEST: Tea Time,” click “Commit Schedule.”

You will see the following message:

Eventmgr26

Click “Create.” (Note: If not the right schedule, click (remove)).

You will be returned to the following screen.  Note that “TEST: Tea Time” is on the Event Title list.

Eventmgr27

To view the new event on the calendar, mouse over top navigation; under “Events,” click “Special” (see below):

Eventmgr28

You will arrive on the “Special” page, where you will see the events calendar, as well as the event and description (within the red box).  If you click “See all” (see red arrow) you will get a detail of the calendar.

Eventmgr29

As you can see from this example, “TEST: Tea Time” appears on the calendar daily from May 6 through May 31, 2013. (Note: you may need to do a “refresh” on your browser to get the calendar update).

Eventmgr30

To Create a Recurrence for Weekly

The module looks slightly different, but the procedure would be the same.  See below:

On Events page, click “+ Add”

Eventmgr31

On “Event” page, complete information (TEST: Coffee & Conversation is sample scenario).  Click “Confirm Schedule”.

The screen will look like this (New comment is highlighted by red box on example):

Eventmgr26

If the information under Event Title* is correct, you would click “Create.”

To view the new event just created, go to Top Navigation, choose “Lectures & Talks.”  On the “Lectures & Talks” page, you will see that the new “TEST: Coffee & Conversation” event has been added to that page. (See red box that outlines the event).

Eventmgr33

Also, if you click “See All” (see red arrow on above event), the full-screen calendar for May would appear, showing the weekly event.

Eventmgr34

How to Create a Biweekly Event

Here is an example of a biweekly Event module.

Eventmgr35

The steps would be similar to weekly recurrences procedure previously discussed.

How to Create a Monthly Event

In this example, “Test: Monthly Family Art Party” is being created.  The location, primary category (Members Only) and Additional Category (Family) have been selected.  On recurrence, dates and times have been entered.  After information has been entered, click “Commit Schedule.”

Eventmgr36

You will get this screen, with a message similar the one below (boxed in red, see next page for example).  If this message is correct, you would click “Create.”

Eventmgr37

You will land on the next screen: See the new event title (boxed in red on the following example).

Eventmgr38

To verify that the event is showing on the appropriate pages, go to Top Navigation, “Events”.  Click “Family”; you will get the “Family” page. Note that the event appears on the page.  Click “Members Only.”  The event announcement also appears on that page.

Eventmgr39

Next, on the ”Family” page, click “See All.”  This will take you to the May Calendar.

Eventmgr40

If you mouse-over May 19, you can see the entire event title (outlined in red on the next example).

Eventmgr42

Finally,  mouse-over then click click the Event Calendar event cell for May 19.You will land on the “Test: Monthly Family Art Party Page.”  This page lists all the recurring dates for this event.


Eventmgr43


How to Create an Annual Event

Creating an annual event is quite similar to creating a monthly event.  After completing necessary information, click “Commit Schedule.”

When you get the following screen, verify that the information under “Event Schedule” is correct.  Click “Create.”

Eventmgr44

You will land on the screen shown in the following example.

Eventmgr45

Note “Christmas in July” event has been added.

Eventmgr47

On Top Navigation, select Events/Special.

Eventmgr48

You will arrive on the following page, which now shows the new event, “Christmas in July.”

Eventmgr49

Click “See All” and you will open the large events calendar.  You will land on the calendar for the current month. If you cursor over to July 2013, you will view the following:

Eventmgr50

Shared Text Content

The purpose of creating shared text content is to make it available or share it with other parts of the website.  It can be access one of two ways:

  1. Clicking the Administration Tab
  2. Clicking the Shared Text Content button on the Dashboard.

SharedTC1

When the Administration tab is clicked, the following option becomes available through the Widget Manager:

SharedTC2

Either the Dashboard option or the Administrative Tab option will land you on the following page:

SharedTC3

How to Edit Shared Content

Click “Edit” button next to the shared content name (in this example, Betty’s Shared Notice).

SharedTC4

You will arrive at the following screen.  (The change that will be made: deleting (Betty is the best)

SharedTC5

By clicking “Options”, you are given the following options screen.

SharedTC11

Whatever you type in the Options box the Shared Content Module is the name of the content. Click OK.  If you have finished your editing, click “Save” on the above module.

SharedTC7

You will be taken back to the Shared Text Content module.

How to Add New Shared Text Content

Click “+ Add Shared Text Content”

SharedTC8

The following module will open.  Type your text in the content box. (Note: You may also right-click your mouse and a “Paste” option would become available. This would enable you to paste text from a word processing program.)

You will also note that the following module contains a WYSIWYG editor; this means that you can type regular text into the Content area and it converts it to html.

SharedTC9

The following test example is used for learning purposes.

Enter text into the Content box.

SharedTC10

Next, let’s see what the html content looks like.  Click “Source.”  This is what you will see.

SharedTC11

Click “Source” again to get back to the regular content box.

Next, click “Options” to get the following screen, where you will enter the name of the content.

SharedTC12

We will call our content “Test Scenario”.  Click “OK” in the Options module. Click “Create.”

You will land on the following screen.  Note that the new shared content, “Test Scenario, “has been added to the Shared Text Content module.

SharedTC13

Shared Galleries

The Shared Galleries module allows you to share your photos and images with selected categories. Photos and images are automatically added to the display widget, where they are categorized for display in either chronological order or by content category.  These widgets  that can be shared on other areas of the website.

 In the Phoenix Art CMS, “Shared Galleries” contains the Collection Highlights for each collection category.  The relationship between the Gallery Collection Images module and the Asian front end web page are shown below:

SGalleries1

There are two ways to access Shared Galleries.

(1)  Starting with the Dashboard, click “Shared Galleries.”

SGalleries2

(2) You may use the Administration Tab.  To do this, click Administration (outlined in red on above screenshot).  When the Administration buttons are displayed, mouse-over the “Widget Manager,” and choose “Browse Shared Galleries.”

SGalleries3

Either access method will land you upon the Collection Gallery Highlights module.

How to Edit a Collection Gallery Highlight

SGalleries4

Using the Asian Collection for demonstration purposes, Click “Edit”.

SGalleries5

The following page will open up:

 How to Add an Image

On the above module, click “+ Add Image” (see above example). The following module “Create a Collection Image” will open up.  Type in the title, upload an image, then click “Create.”

SGalleries6

 How to Edit an Image

To edit the Suit of Samurai Armor image, (the first image on the module example below) click “Edit” for that image.

SGalleries7

You will open up the following page.  After making your changes, click “Save.”

SGalleries8

Shared Navigation

The Shared Navigation modules allows ease in  managing the Top Level Navigation on your website.  The following example shows top navigation on the front-end of your website (outlined in red):

Sharednav16

To access Shared Navigation, click “Shared Navigation” on the Dashboard.

Sharednav1

You will land upon the following screen:

SharedNav2

How to Edit a Menu Item on Top Level Navigation

Using “Collection” for this example, click “Edit”.  The following screen will open:

SharedNav3

SharedNav4


To Edit a Navigation Entry, click “Edit”.  (For this example, we are using “Contemporary”—See below).

SharedNav5

The following screen is presented.  Edit and click “Save”.

SharedNav6

 How to Add a Section

From the following module, click “Add Navigation.”

SharedNav7

You will arrive this screen: (Note:  A menu item by the name of “Animal Photos” is used in this example).  After entering the name, you would click “Create”.

SharedNav8

The following screen will be presented.  Click the “Options” button

SharedNav9

The Navigation Options screen opens.  This allows you to upload an image.  Click “Upload Image” button.

SharedNav10


SharedNav11

Click “Add File”.  Choose an image from your picture file.  Or, if there is a Library, you may click “Library.” Follow the instructions for cropping your photo.  Click “Continue”.

SharedNav12

Select “Save”.

SharedNav13

The following screen displaying  a preview will appear.

SharedNav14

Click “Add Navigation Link.”  The Link Details page will open:

SharedNav15

Click “Create”.


Shared Slideshows

The purpose of the Shared Slideshows module is to create slideshows.   The Shared Slideshows module contains various widgets; the purpose of sharing these widget types is to make them available for use on other areas of the website.

On the Phoenix Art website, this is what the slideshow looks like on the homepage.  The images within the box annotated by the red arrow change every few seconds until it cycles through all the designated slides, then it starts over again.

Sslide15

On the back end, there are two ways to access the “Shared Slideshows” module:

(1) By the Dashboard, via the “Shared Slideshows” button (as outlined in red below).

SSlide1

Or, (2) By clicking the Administration tab (outlined in red above).  To access the “Widget Manager” button, you would mouse-over it and click  on “Browse Shared Slideshows.”  (see the following example):

SSlide2

Using either of the above access methods will land you on the “Shared Slideshow Manager” (see the following example).

Sslide3

Note:  Your own company’s website may have more than one slideshow.

How to Add a Slideshow

Click “+ Add Slideshow”.  You will arrive on the following module:  (Note: For demonstration purposes, we will name the slideshow “Animal Parade.”)

Sslide4

Select “Shared Content.” Click “Create”.  You will then get the following screen:

Sslide5

Click “+ Add Slide.”  You will get the following screen.  For demonstration purposes, we have added the title “Buddy” and the subtitle, “He just wants to be your best friend.”

Sslide6

Next, click “Upload”  You will get the following screen:

Sslide7

Click “+ Add file….”; select image from your files.  You will be presented with the following screen, where you can crop your image.

Sslide8

Once you complete cropping/resize, click “Continue .”  The following image will appear:

Sslide9

Click “Create”.  The following screen will be presented:

Sslide10

At this point, you may repeat this process by clicking “+ Add Slide”, or you can select “X Close” If you choose close, you will see the following screen:

Sslide11

You will see that the new slideshow, “Animal Parade,” has been created.

 How to Edit a Slideshow

Click “Edit” on the line next to the slideshow” Homepage Slideshow.” The following screen will be presented.

Sslide12

On the above module, it is possible to change the order of the slides by simply dragging them into the order you desire.

By selecting “Options”, a new screen opens up (see example below).

It is possible to (1) Change the number of seconds each slide will display (b) select the transition (a drop down menu offers various options, see below), and (c) Select or Unselect shared content.   Click “Save” to save any changes.

Sslide13

There is an Update Slide module for each slide within the slideshow (the following is an example of only one).

Sslide14

Edit the slide and click “Save.”


Media Manager

The purpose of Media Manager is to manage the content files used within your website.  You may access the  Media Manager module one of two ways:

(1)       On the Dashboard (outlined in red in this example) OR

(2)       The Administrative tab, File/Media Manager

Media1

If you click the Administrative tab, you have the same options available.  Mouse-hovering “Page Manager” button opens a list of three options (see below).

Media2

You may browse the folders in two of the following ways:

 1.  Use the Folder Browser (see below).  When you click the “+” signs, the files are listed below the folders (See examples 
Media3  Media4

2.  Secondly, to expand the folders is to click one of the blue folder icons (PDF, Documents or Images).

Media5

The results of the folders expanded to sub-folders are shown in the following examples:

 Media6
How to Create a New Folder
 
Click “Create Folder”. 
 Media7

You will be presented with the following screen:

Media8

Enter the folder name (the example shown here is “TEST”)

Media9

Click “Create”.  The “TEST” folder has been created (see below).

Media10

How to Delete a Folder

Click Delete.  You will get the following screen.  To delete the “TEST” file we just created in the given example, you would click on the “TEST” folder.

Media11

You would be presented with the following prompt:

Media12

Click OK to proceed with the deletion.

 How to Rename a Folder

Click “Rename”.  You will get the following screen.

Media13

To rename the “TEST” folder example, choose the “TEST” folder.  You will get this screen:

Media14

Rename “TEST” to “Quizzes”. See result below.

Media13

 How to Upload Files

Click “Upload Files” button on Media Manager module.

Media16

In the example, “Add Files” was chosen; Flower.jpg was added.

Media17

To upload the file, click “Start upload” button or “Start” button.  The filename appears in green: “Flower.jpg.”

Media18

Click “Create.”  The file appears next to the folders

Media19

If you click on the new file, a screen opens up.  You have options to rename, replace or delete the file.

Media20

Administration Tab

The Administration tab is located on the left-hand side of any page while logged in.

DashAdmintab

When you click the Administration tab, the following module opens up:

Admintabopen

This Administration module offers shortcuts to the tools most frequently used.  These functions will be described within their own posts.

The Dashboard

The Dashboard is the center of all activity on the back-end of your website.  After logging in to C2MS, you will land upon the Dashboard.  You can also be brought back to this page by clicking the Dashboard button on the initial page for each tool or the Administration Tab.

It is important to understand that your company’s Dashboard and Administration Tab will most likely differ from the one discussed in this manual.  Another factor that affects what is displayed on the Dashboard/Administrative Tab is to which modules the user has access to; e.g. if the user has not been granted access to a module within the Role Management function, the button for that module will not display on the Dashboard.

The Dashboard gives you the ability to manage all the functions available on your company’s website. These functions can be accessed from this page by simply clicking on the module you need to edit or by using the Administration Tab.

Dashboard