Frequently Asked Questions

Question:  What does CMS stand for?

Answer: It means Content Management System.  Content refers to any files and information that makes up your website or back end. “Management” refers to the Back End; this includes both the dashboard and administration tab.  “System” means that the content or resources are managed a systematic way so they are mutually usable by company-authorized users.


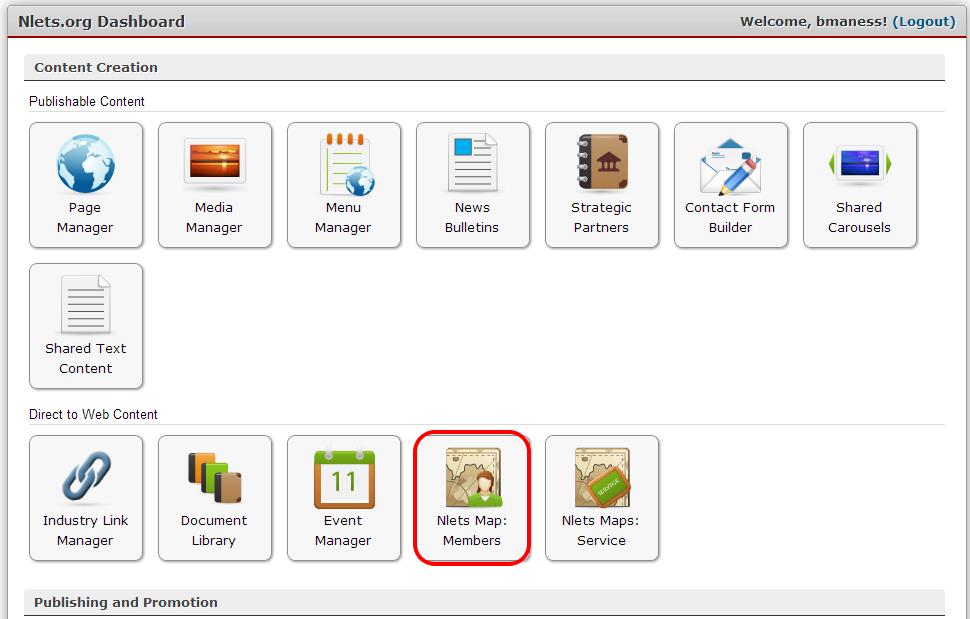
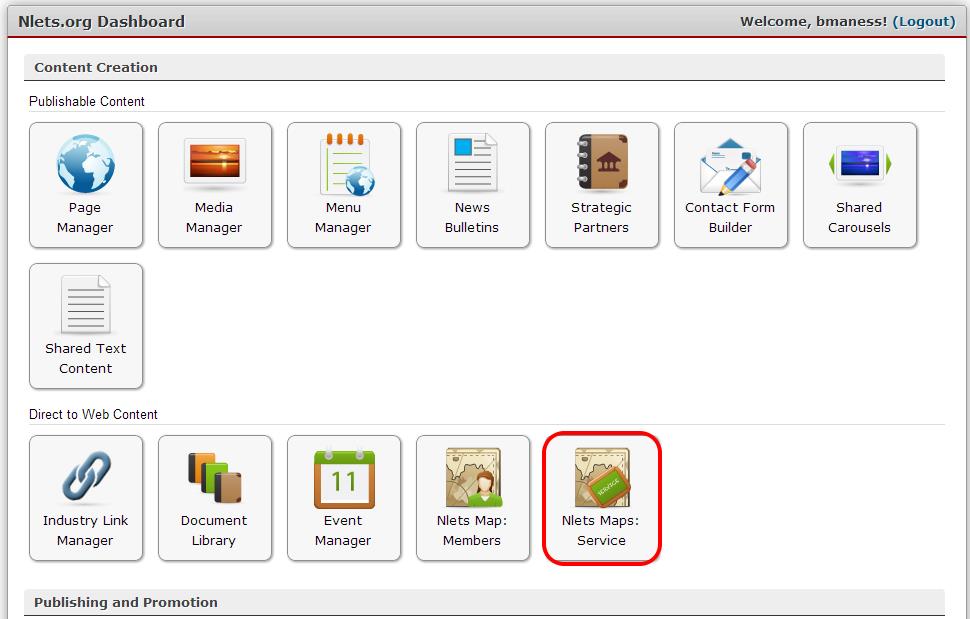
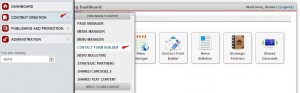
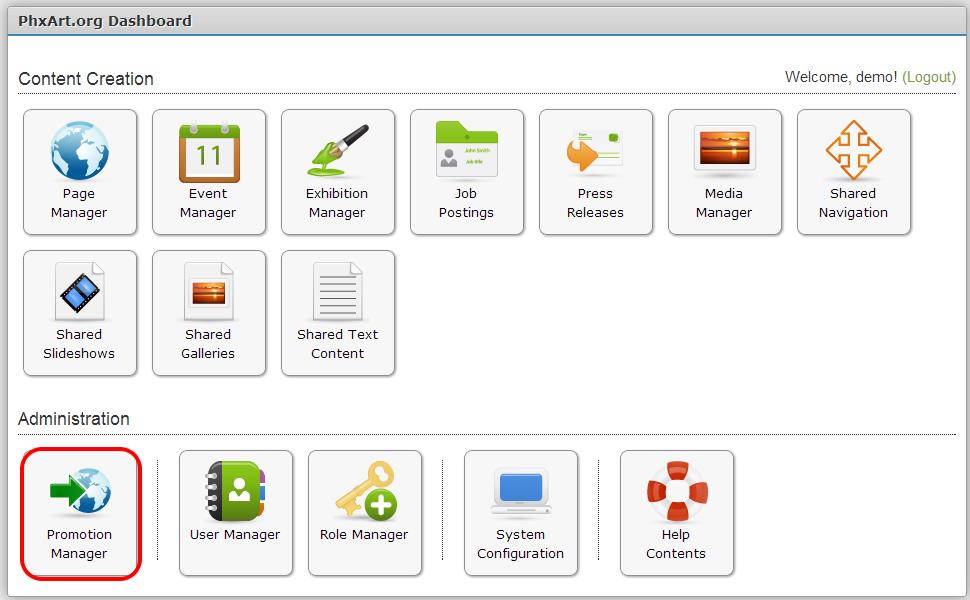
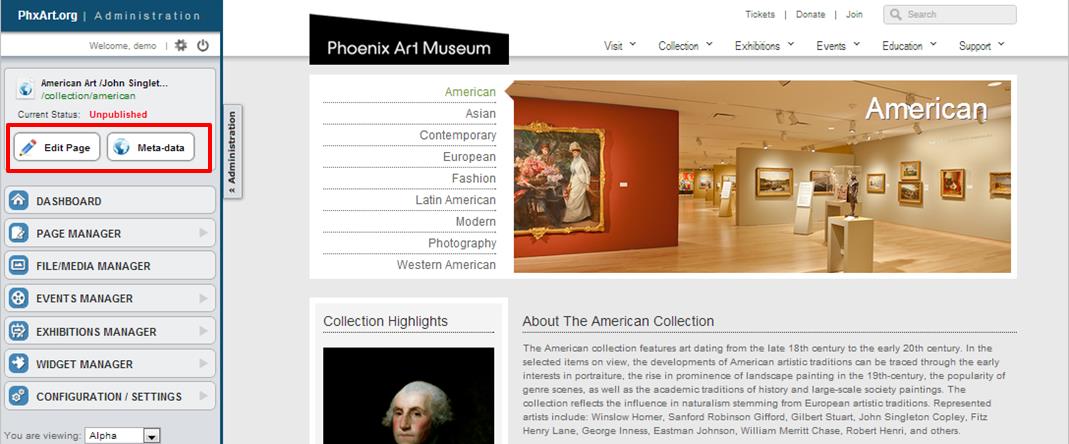
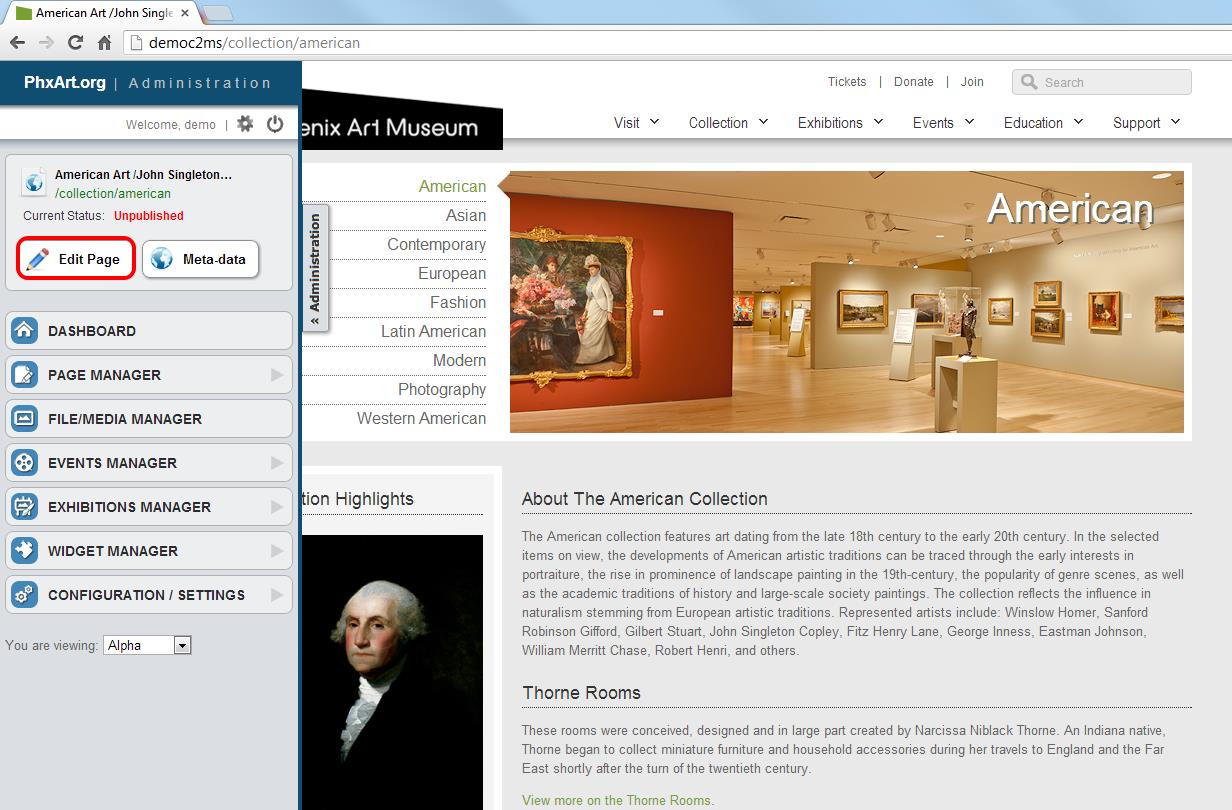
Question:  What is the Back-End? 

Answer:  This means the Dashboard or The Administration panel, where your company manages its site and content. It is restricted to users who have the “Access Administration panel” permission.


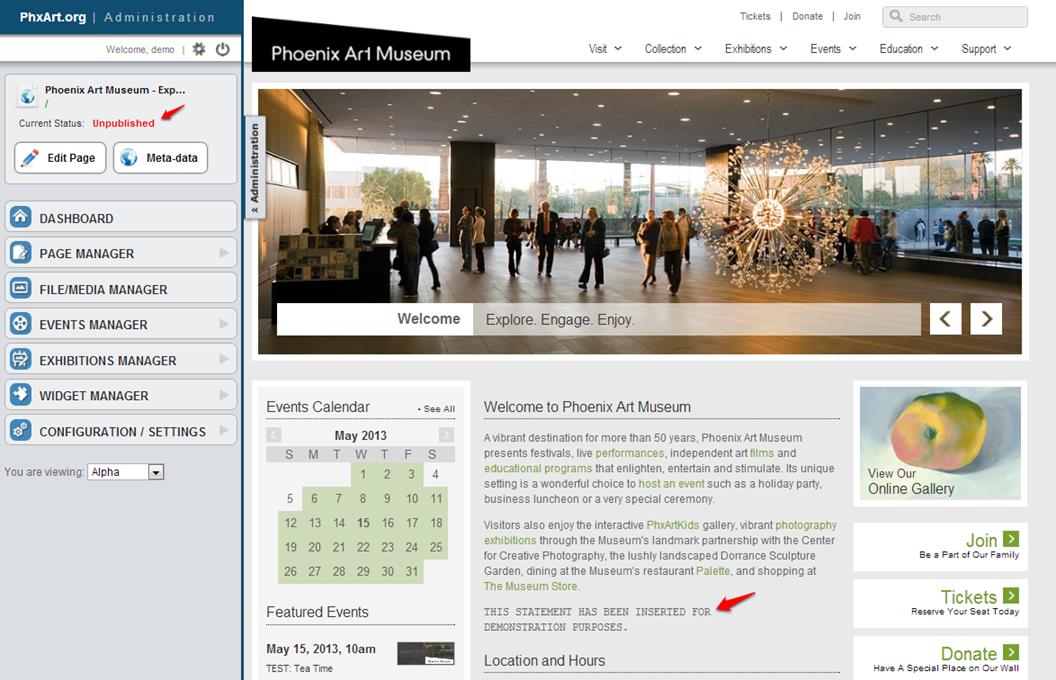
Question:  What is Front-end?

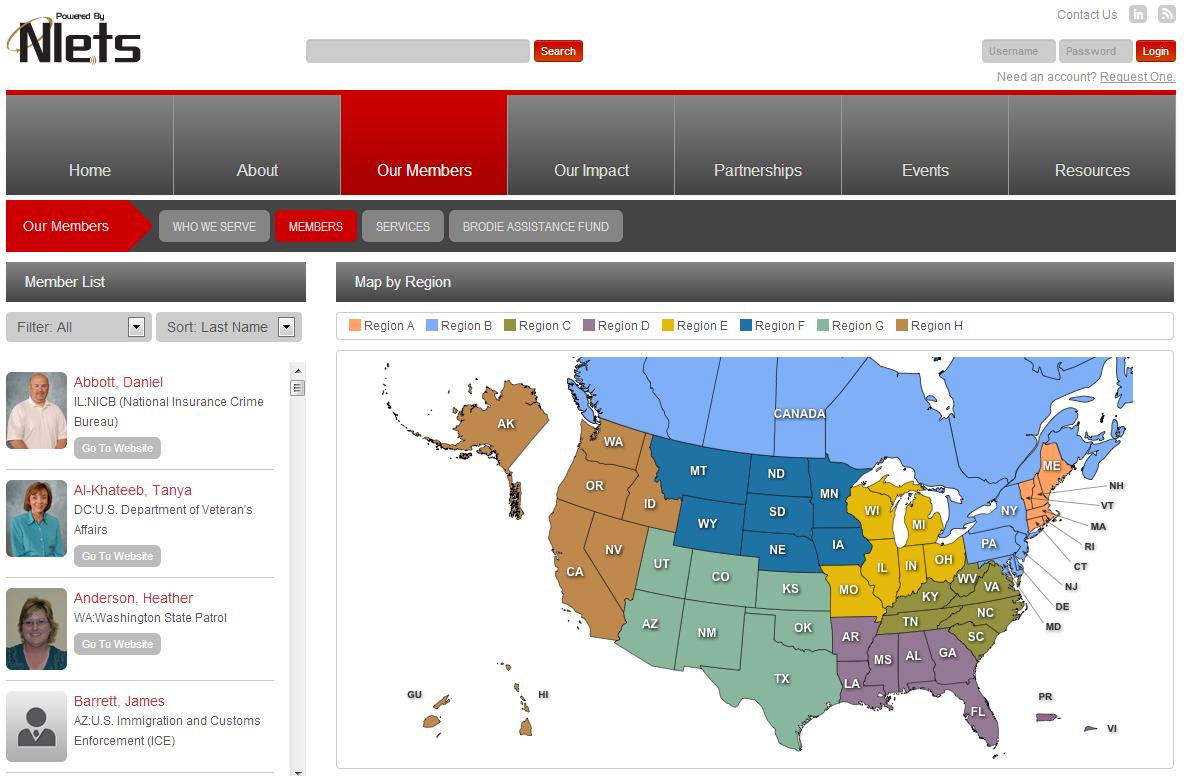
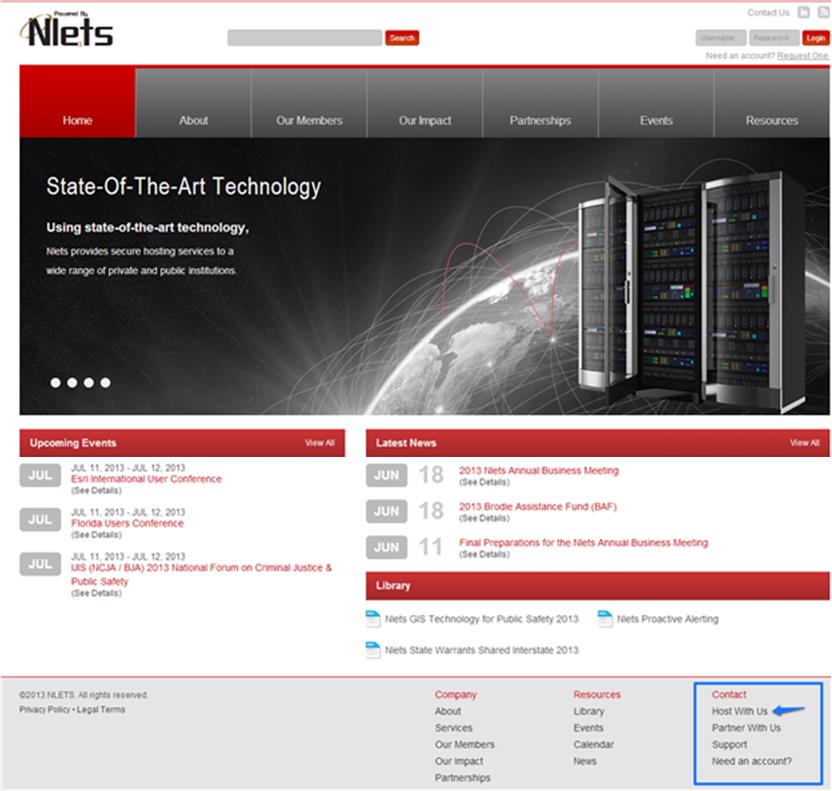
Answer:  The front-end is the part of a website that is accessible to the public; e.g. regular and anonymous users. In other words, it’s the public-facing part of your website.


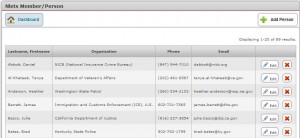
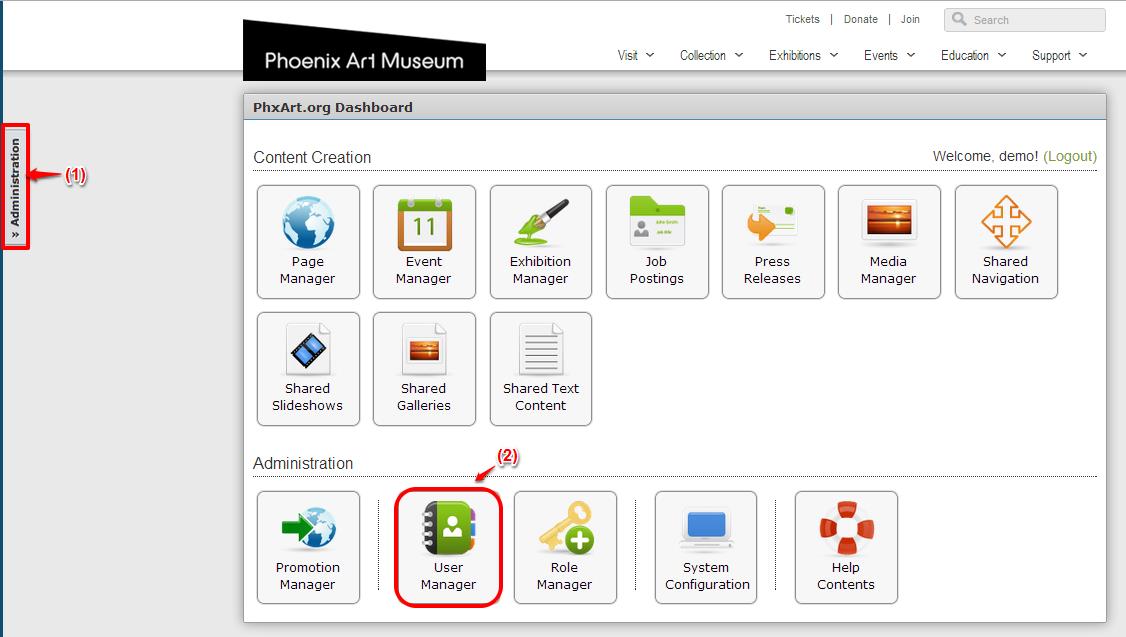
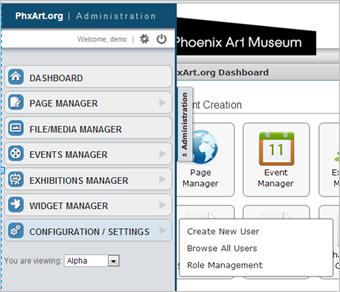
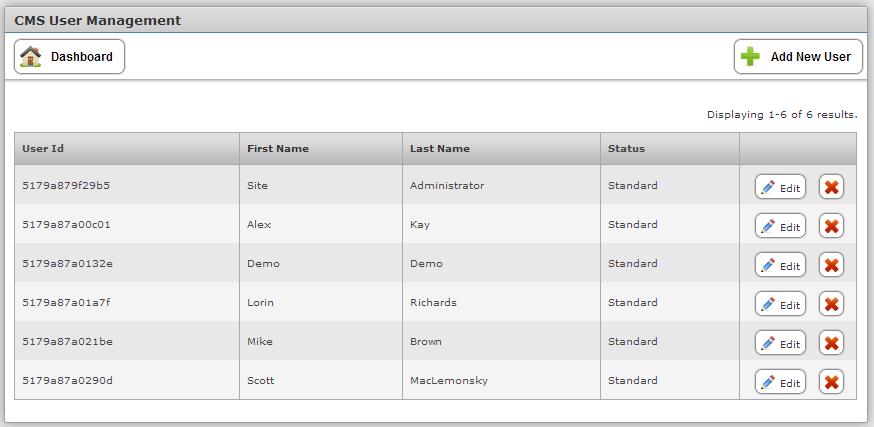
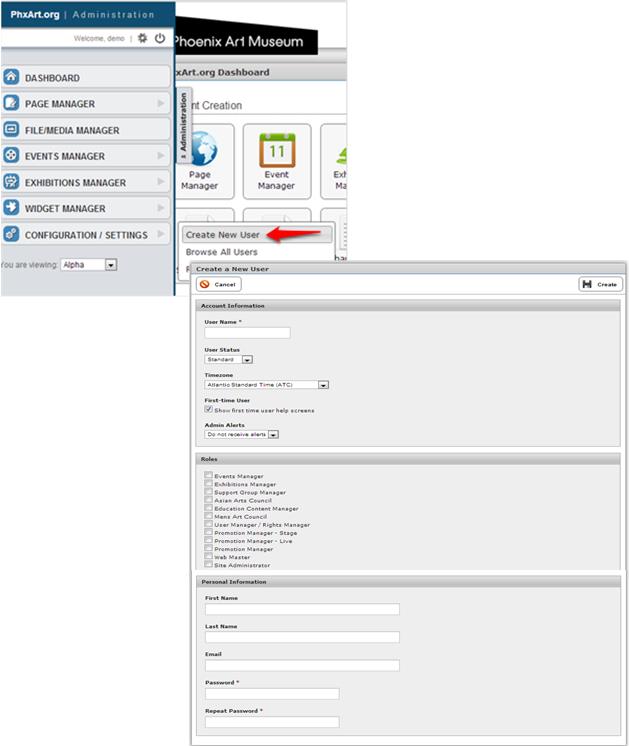
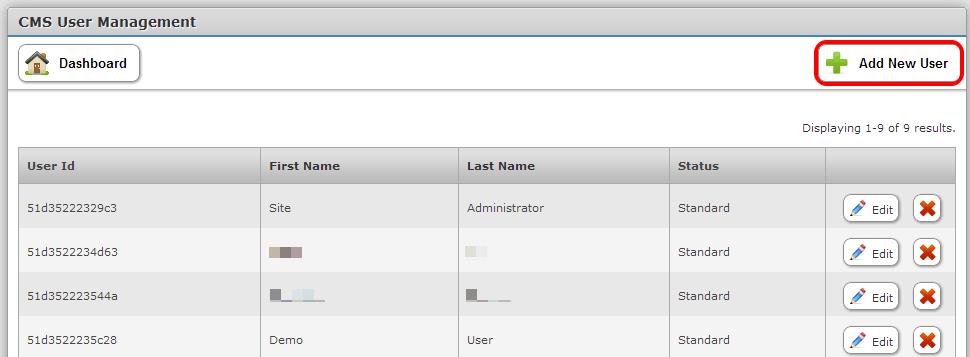
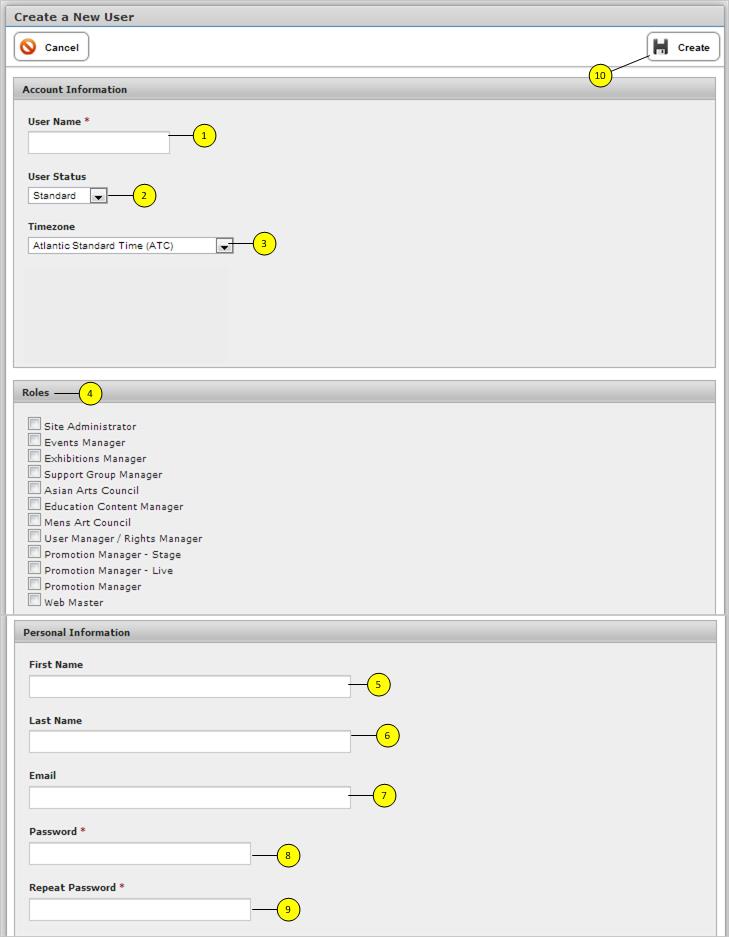
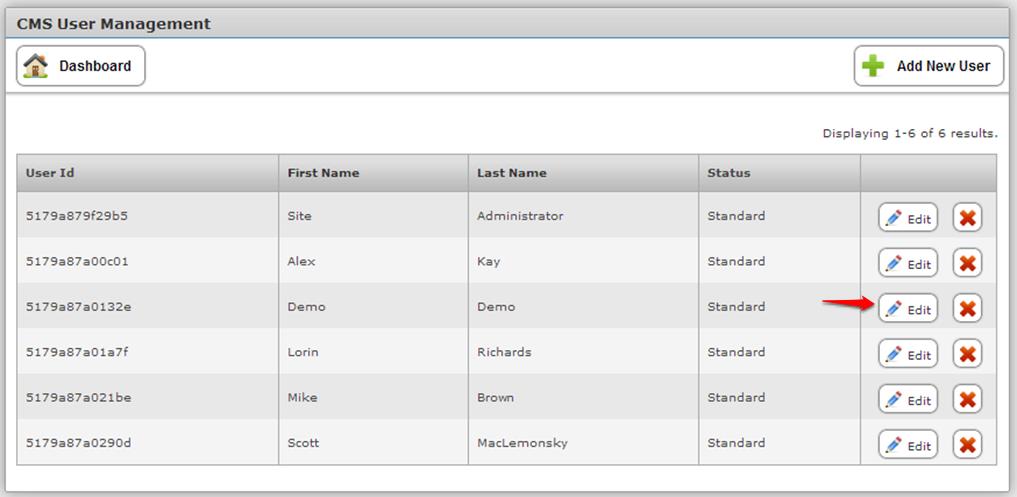
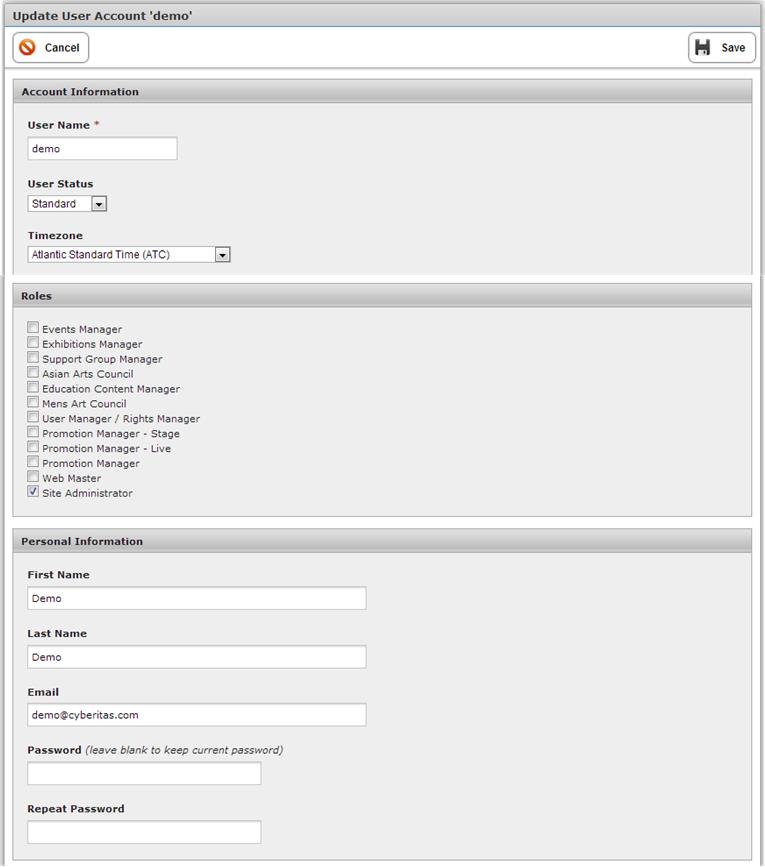
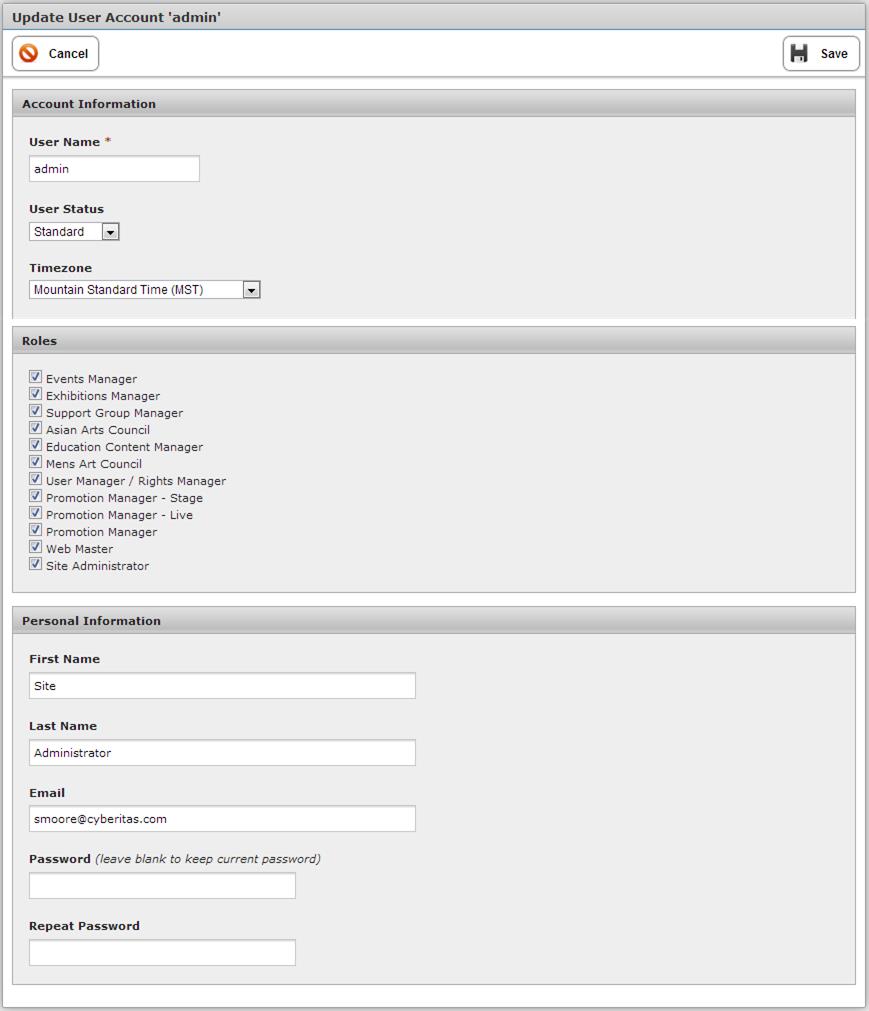
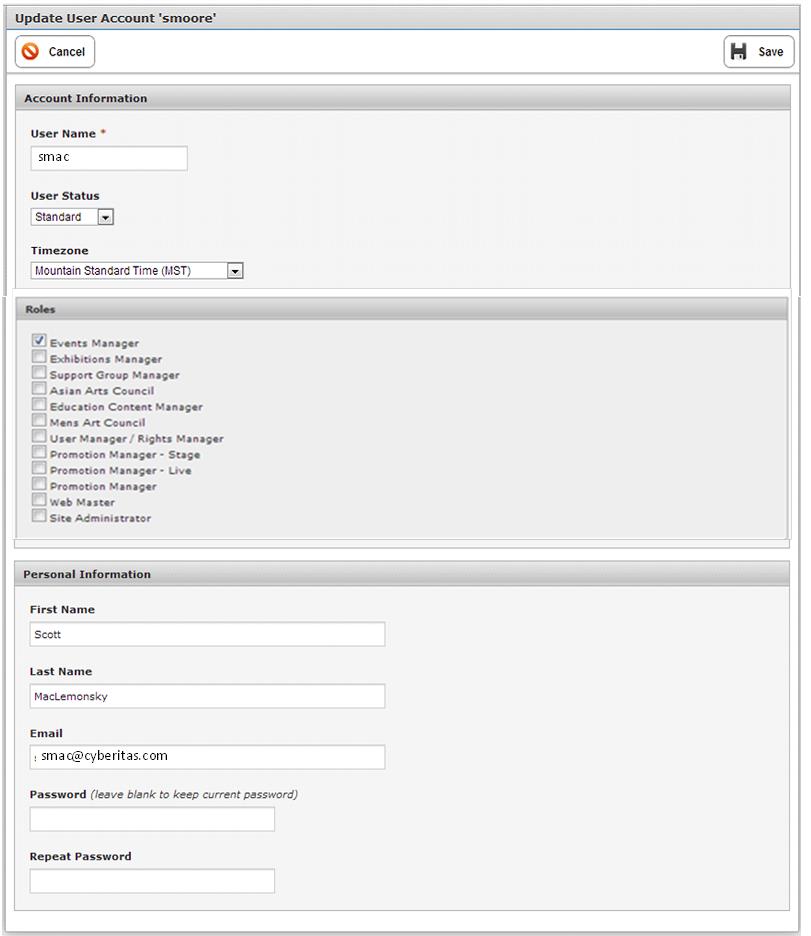
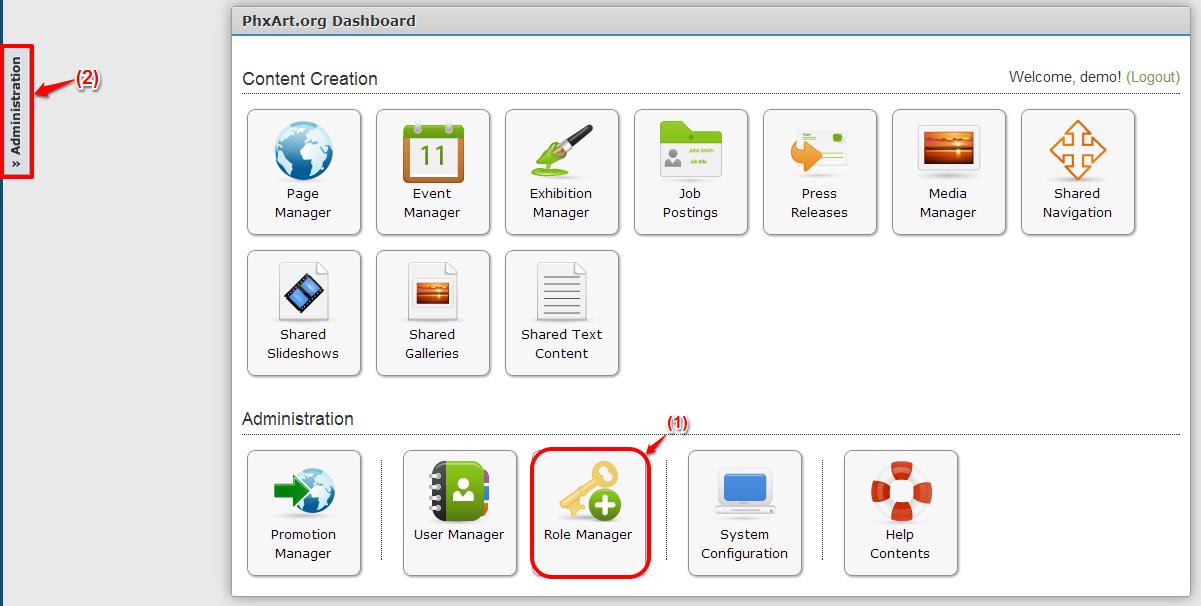
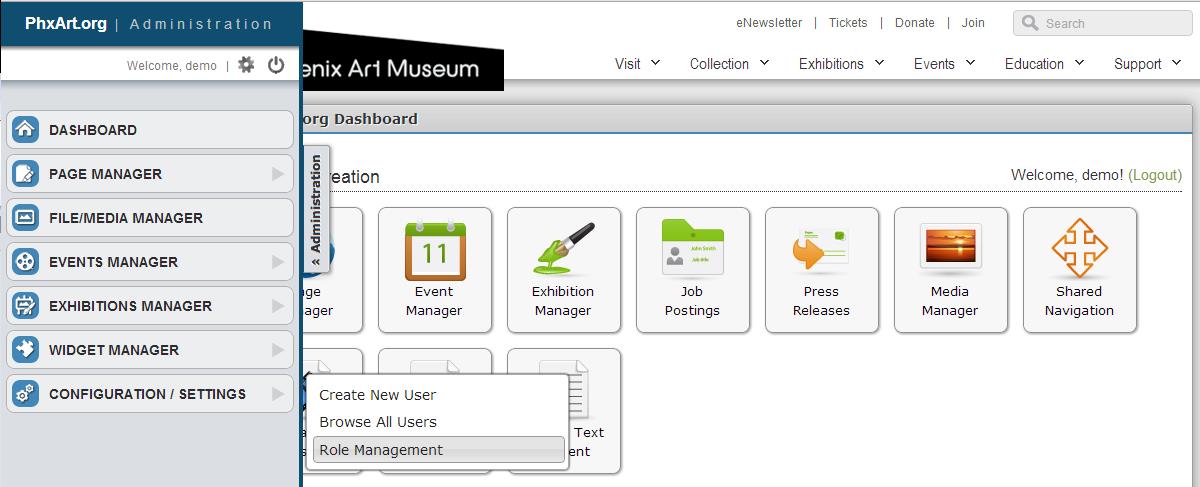
Question:  What is the relationship/difference between the User Manager and the Role Manager functions?

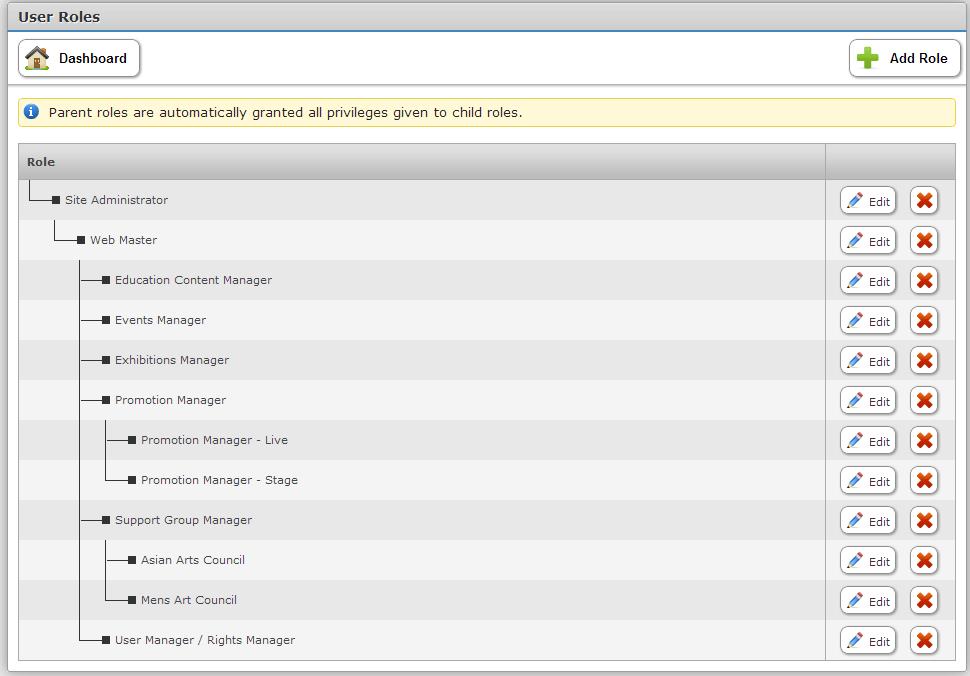
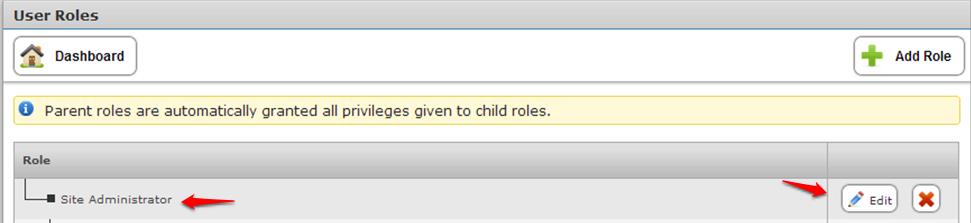
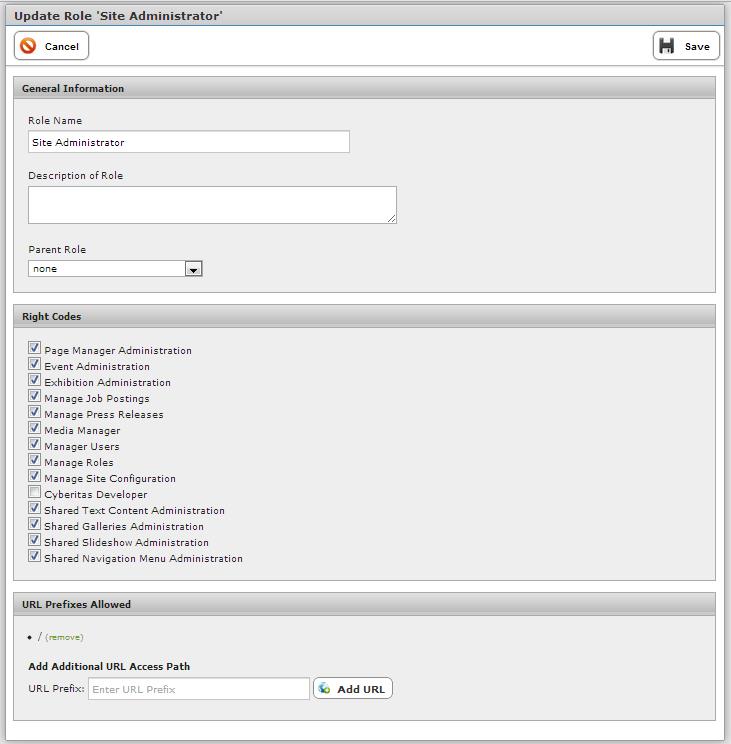
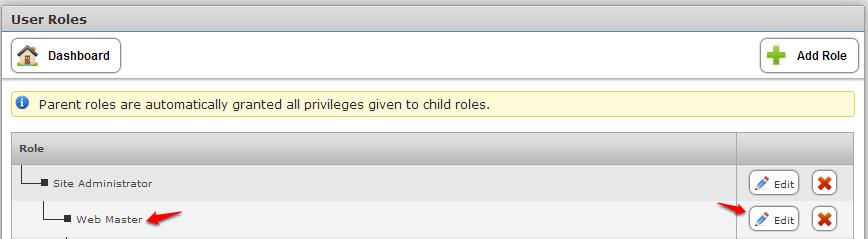
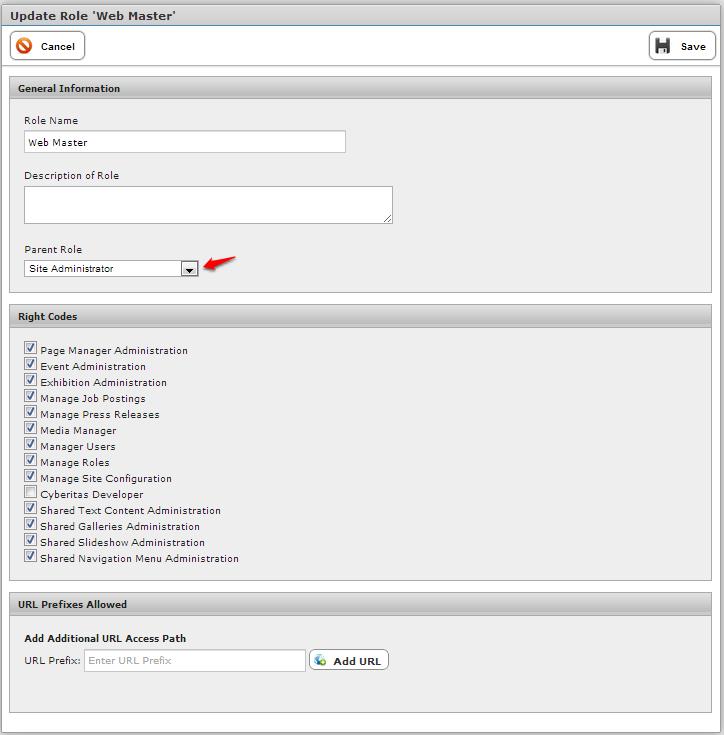
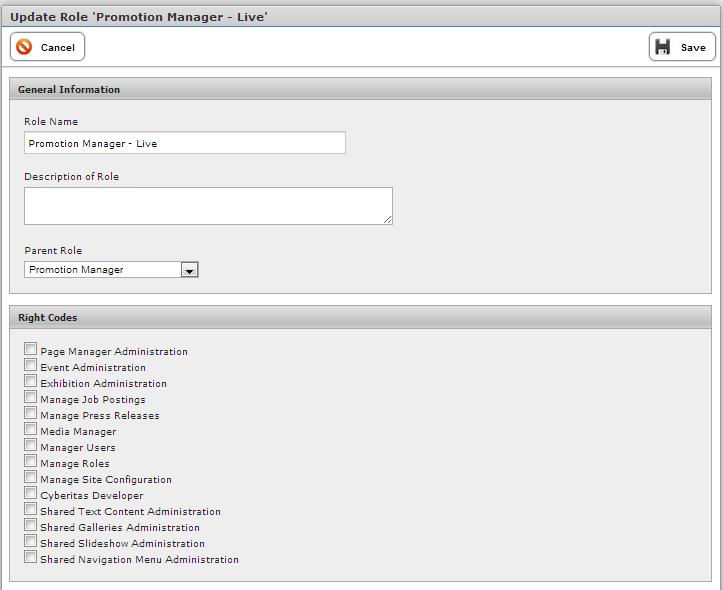
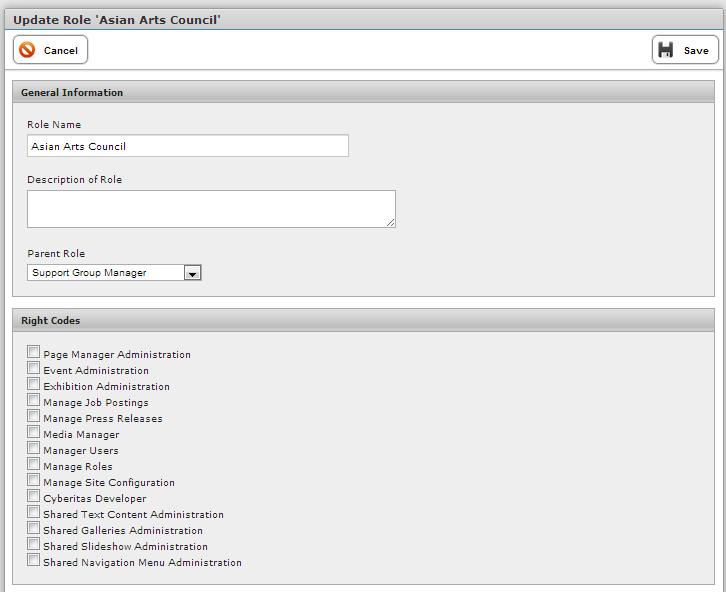
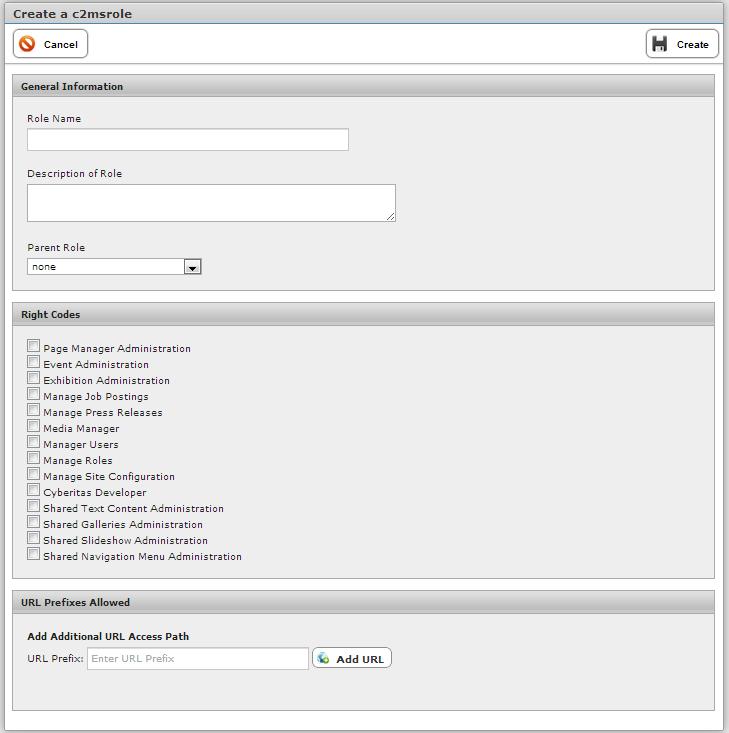
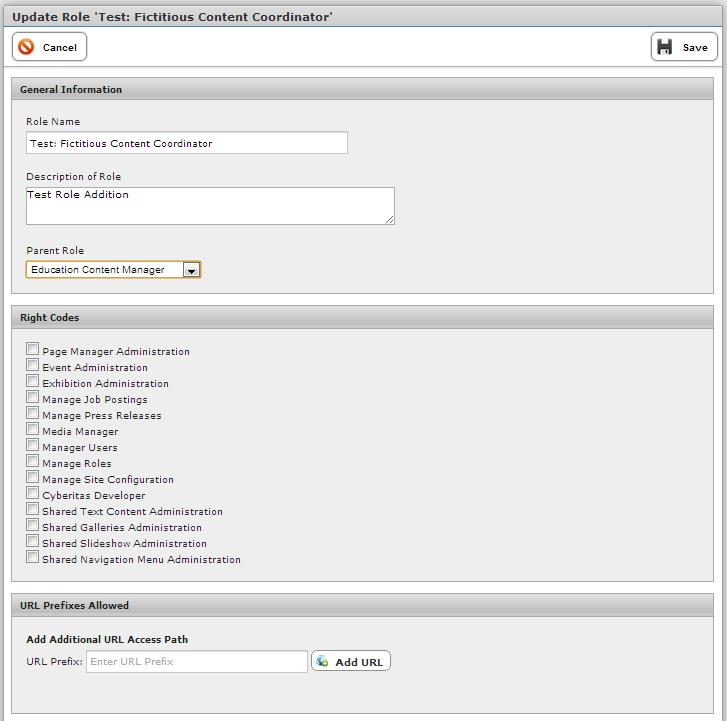
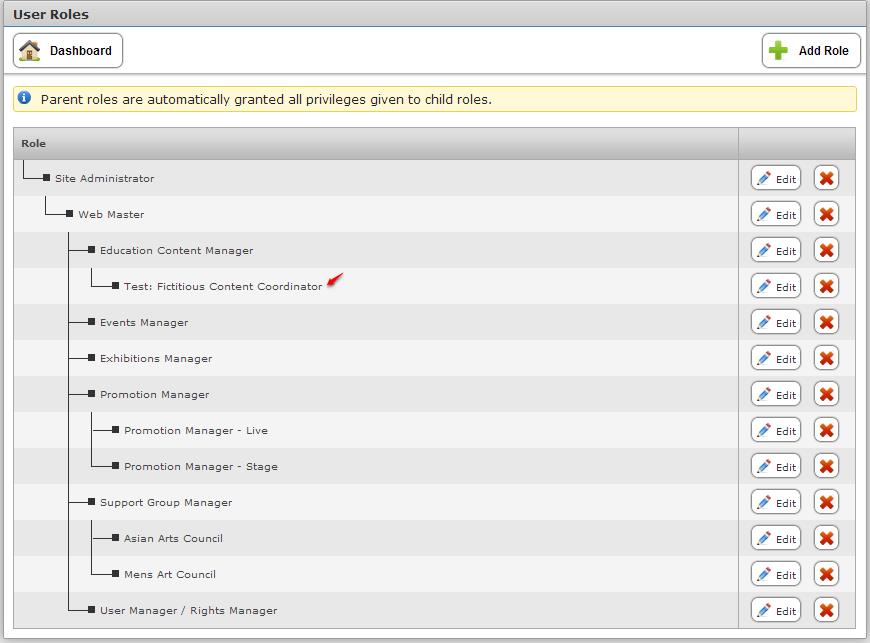
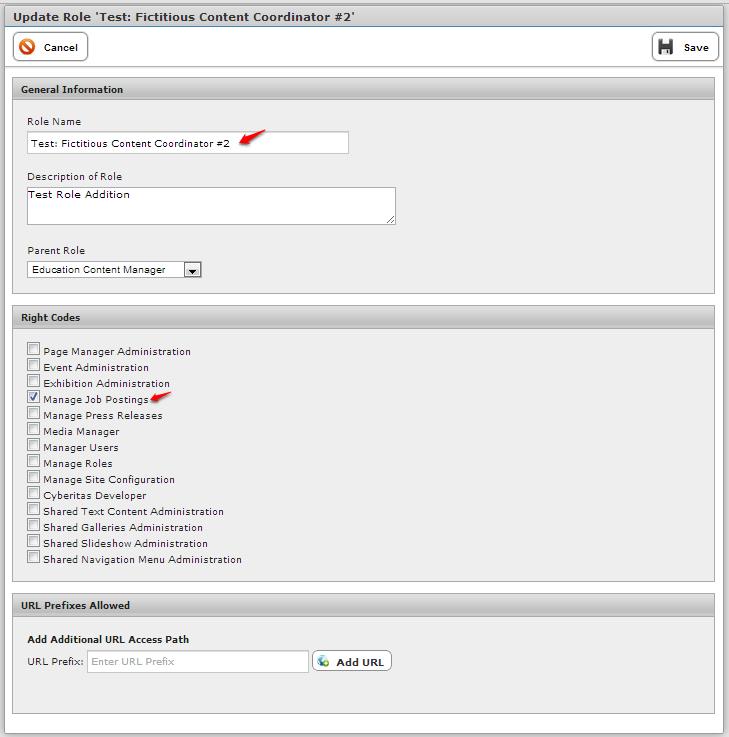
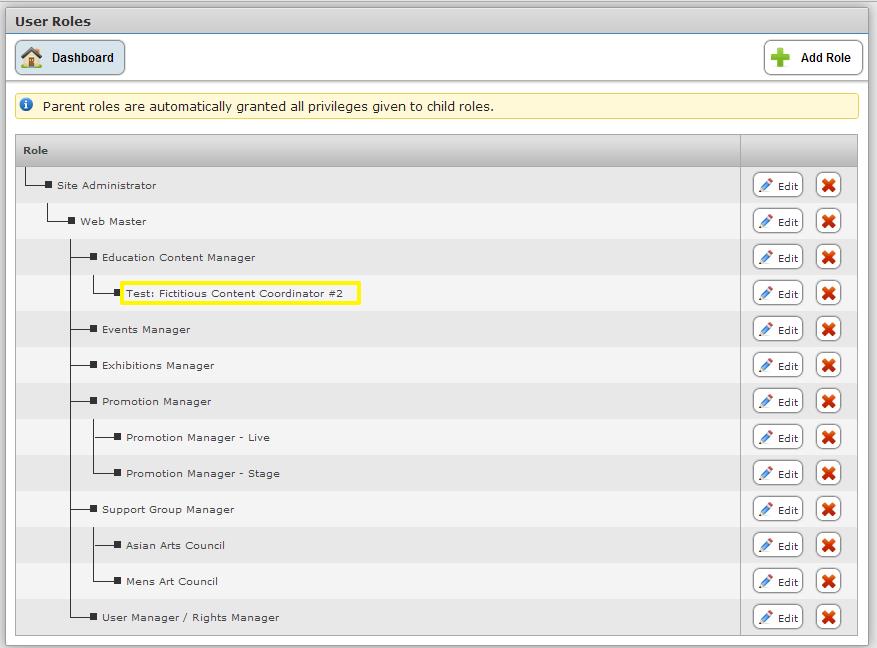
Answer:  User Manager maintains users and logins of CMS, whereas Role Manager manages roles of the users.  The definition within a role gives the user rights to do things like add photos, modify certain modules, add new pages, and so forth.  Roles will vary from company to company.  The role structure looks somewhat like a company organizational chart, except the roles are for the functions the user is allowed access rather than a job description, as it would be with the Role.


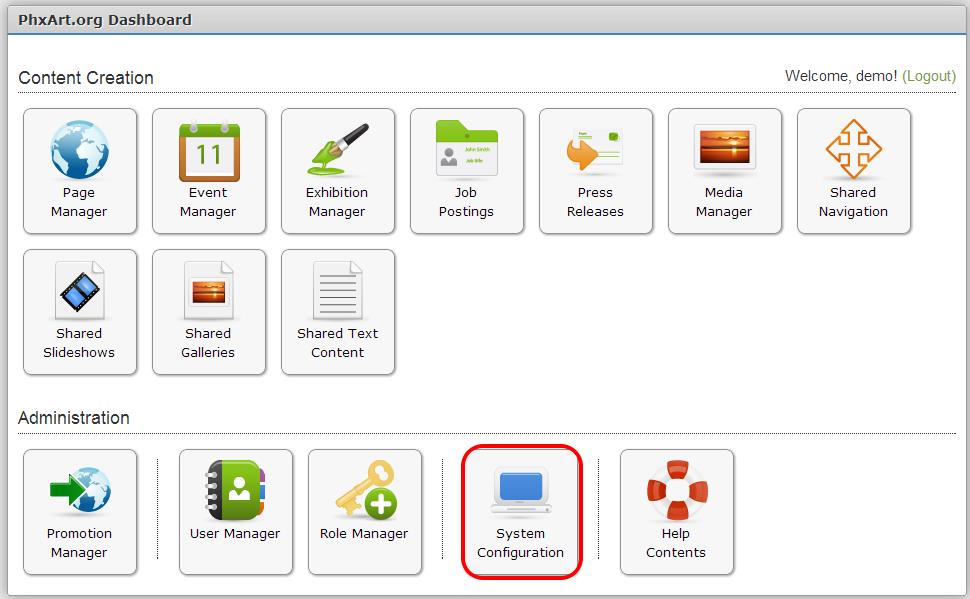
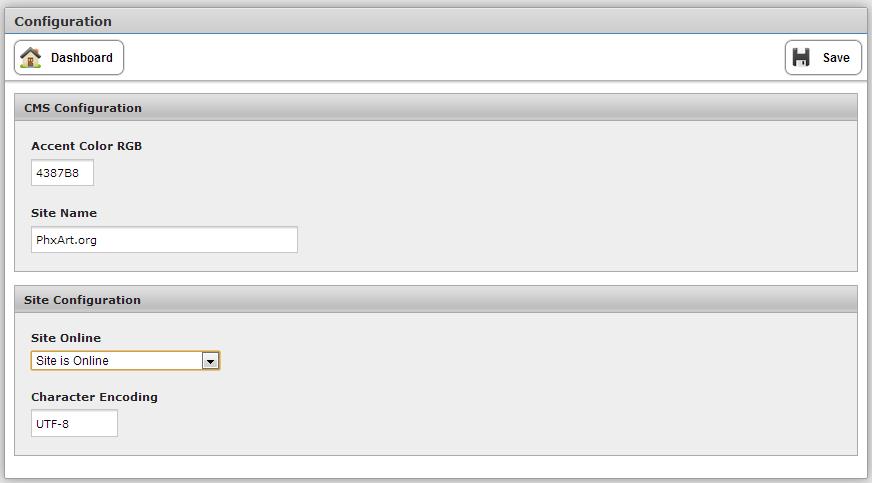
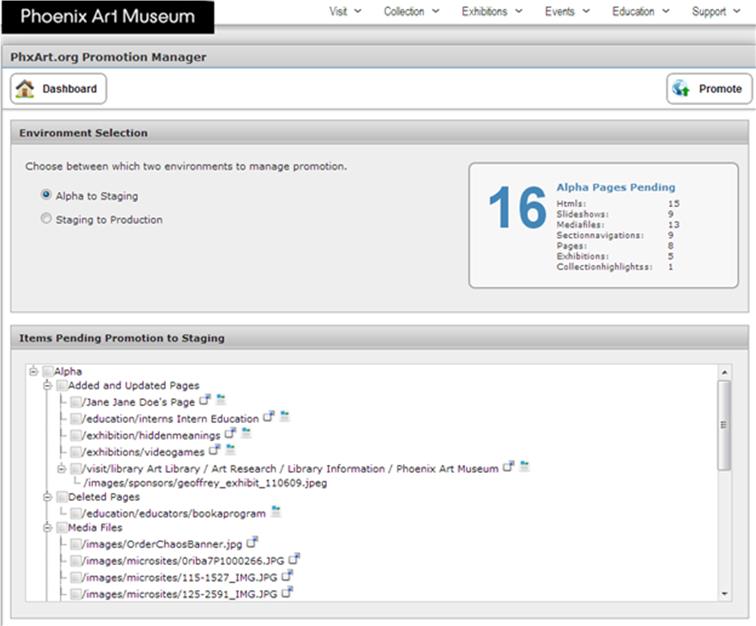
Question:  What is the System Configuration button on the dashboard for?

Answer:  This is configuration changes.  Most likely your company’s System Administrator or Web Master will be responsible for any updates.


Question:  What if the calendar does not update after I add a new event?

Answer:  You can make this happen immediately by clicking “refresh” symbol  on your browser.


Question:  Where can I access the CMS User Guide?

Answer:   Go to the Dashboard and click the “Help” button.


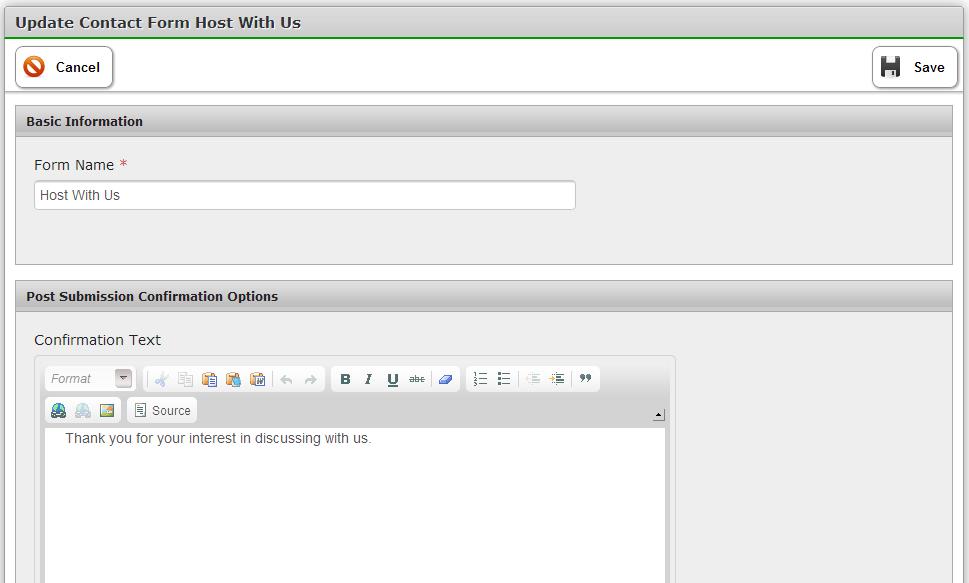
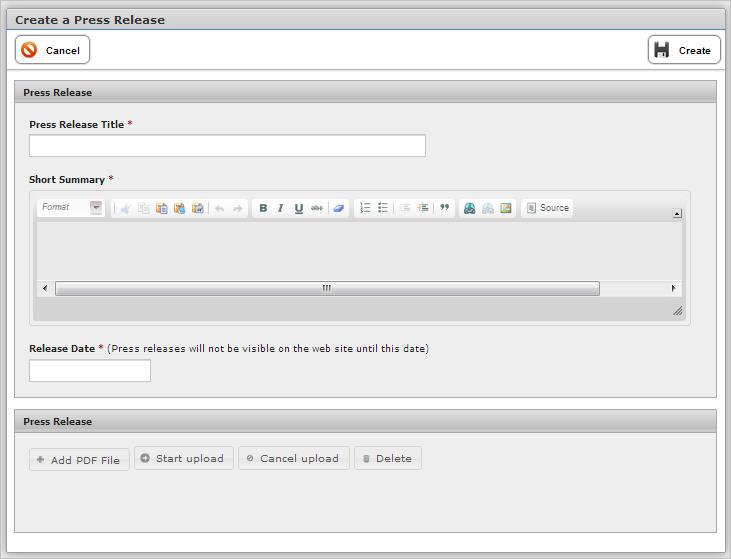
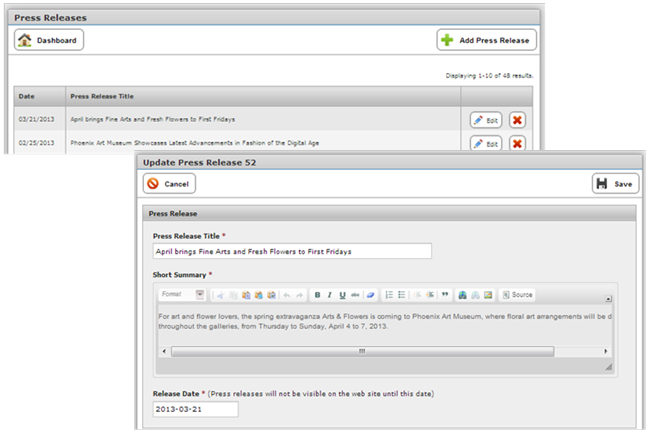
Question:  What is a WYSIWYG editor how does it relate to my company’s CMS?

Answer:  The acronym “WYSIWYG” means “what you see is what you get,” In your company’s CMS, there is a built-in html text editor (or WYSIWYG editor) that makes it possible to enter your text content into a specialized module that has all the typical word processing features.  This html text editor automatically converts your text content to html; however, the person entering the text content views this text content input as it would appear on the front-end web page.

Maps:Members

The Member Map module is used to add/import members.  The front-end result is a map that displays a regionalized color-coded map, coupled with a sidebar that has a sort function so you can view the photos and profiles members for the selected region (See the following example).

MapsMem6

On the back end, the Nlets Map: Members module can be accessed by clicking on the dashboard (see below).

MapsMem1

You will land on the following screen (example shows a partial screen):

 MapsMem2

To Add a New Member/Person

click “+ Add Person.”  You will land upon the following screen (see next page for a completed test example.  Note:  The red asterisk (*) means that the information in that cell must be completed in order to create the new member.

MapsMem3

After completing the Create an Nlets Person module, click “Create.”

You will land on the following module.  Note that the new person has been added.

MapsMem4

To Import a Member

Click “Import Members”

Mapmem9


When this screen opens, click “Choose file” and “Import.”

MapMem7

To Edit an Existing Member/Person

Click “Edit” on the line that you need to edit. You will be taken to the following module, where you would make your change and click the “Save” button.  Or, if you change your mind about the change, you may click the “Cancel” button and you will be returned to the Nlets Member/Person module.

MapsMem5

To delete a member/person, click the red “X” on the right-hand side of the Nlets Member/Person module.


Maps:Service

The front-end webpage for “Our Members/Services” contains a feature which allows the user to view which services are available for what regions by simply clicking one of the items on the list of services.  The “Service Available” results appear on the map as red coloration.

Mapserv1

On the Nlets Dashboard, you may access the back-end application by clicking the Nlets Maps: Service button (see below).

Mapserv2

You will land upon the Nlets Services module.

Mapserv3

To add an Nlets service, click+ Add Nlets Service” button on the Nlets Service module.

Mapserv4

You will land upon the “Create Nlets Service” module.  Complete the Nlets Service cell and check the appropriate items on the Service Map listing, then click “Create.”

Mapserv5

To edit an existing service, click “Edit” (See below).

Mapserv6

The “Update Nlets Service” module will open up.  Once you have made your changes, click “Save.”

Mapserv7

To delete a service, click “X” on the Nlets Service module.

To cancel and return to the former module, click “x Cancel.”

To return to your Nlets Dashboard, click the “Dashboard” button.


Contact Form Builder

The contact form builder module allows C2MS users to create online contact forms that are automatically stored in a local database for later reporting with an optional notification email.   This feature is perfect to create website contact forms as well as other simple data collection forms like very simple surveys and other data gathering tasks.

For example, this excerpt from the Nlets home page shows the area where a form may be offered to the website viewing public (see area outlined in blue).

Contformmainpge

From the Nlets Dashboard, this function may be accessed by clicking the Contact Form Builder button (highlighted in red) or by the Administration Sidebar (see red arrow).

Contform1

This is what the Administration Sidebar looks like when opened:

Contform2

Whether you use the Contact Form Builder or the Administration Sidebar, you land upon the following module.  To add a Contact form, click  “ + Add Contact Form.”

Contform3

You will land upon the Create New Contact Form module (see the following example).  Note: For demonstration purposes, the “Host with Us” form will be used as an example.

How to create a new contact form

  1. Complete “Form Name.”
  2. Confirmation Text – This cell is completed only if a confirmation email will be sent to the requestor.
  3. Notification Email – This is optional; it is only necessary if a confirmation is to be sent to the requestor.
  4. Notification Subject – This cell is for inputting a brief explanation of the topic of the form
  5. Notification Message – This is for inputting a more detailed explanation of the purpose of the form.
  6. When finished, click “Save.”

Contform4

You will land upon the following module.

Contform5

Using the Form Element Toolbox, Click “Title.”

Contform6


You will be presented with this screen, where you can enter your form title.

Contform7


Click OK.

You will be taken back to Create your Contact Form.  Using options from the Form Element Toolbox, repeat these steps, using the Single Line Text tool to and an other options on that list to create the individual cells.  When you are finished, click the blue “Submit” button.  If you are satisfied with the form, click “Finish.”

The completed module for the “Host with Us” form would look like this:

Contform8


Click “Cancel” to return to the Contact Form Builder module.

How to Edit a Form

To edit the “Host With Us” form, click “Fields.”  (see below)

Contform9


If you mouse-over any of the form cells, you will see editing tools.

Contform10


  1. The pencil symbol is for editing.  Clicking gives you an editing screen to change the text.
  2. The “trash” can symbol is to delete that cell.
  3. Clicking on the orange plus sign makes it possible to rearrange the order of the cells.  This is a “drag and drop” function.

When you are done editing, click “Save” and “Finish.”

The Options button takes you to the Update Contact Form Host With Us Module.

Contform11


Contform12

After making changes to this information, click “Save.”


User Manager

The purpose of User Manager to issue permissions to designated administrative website users. This is to provide access so these users can make changes on select areas of your CMS website.

There are two ways to access User Manager:

(1)       Using the Administration Tab
(2)       User Manager button on the Dashboard

UserMgr1

Here is a screenshot of the menu that becomes available when you click the Administrative tab.

When you mouse-over the “Configurations/Settings” button, the “Create New User” and  “Browse All Users” options become available (see the following example).

Usermgr2

You can either click “User Manager” button on the Dashboard OR click the “Browse New Users” to arrive on CMS User Management (see example below).

Usermgr3

An advantage of using the Administration Tab to access the User Manager is the ability to directly access the “Create a New User” form.  (See example below).

UserMgr4

How to Add a New User

As explained in on the previous example, you may add use the Administration Tab to immediately access the “Create a New User” form.

If using the Dashboard, you would arrive on the CMS User Management screen.  Click “+ Add New User” (see below):

Usermgr5

You would then land upon the “Create A New User” (see the next page).

 Note: User Types and Roles Vary from Company to Company. As you look at this example, please keep in mind that your company’s listing of roles will most likely differ from this example.  This is also affected by the User Roles assigned by your company’s management.  User Roles are established within the Role Manager module (see the next chapter on “Role Management.”)

Usermgr6

  1. Enter User Name (coordinate this with your company’s system administrator)
  2. Choose user status from drop-down (choices are Standard and Suspended)
  3. Choose time zone from drop-down (there are numerous choices)
  4. Roles – check the boxes/functions the user is to be given the authority to access and modify.
  5. Enter First name
  6. Enter Last Name
  7. This is for your email address
  8. Enter your password
  9. Repeat password to verify.
  10. Click “Create” (Note: if you change your mind, you may click “Cancel.”)

How to Edit an Existing User

Usermgr7

From the above module, select “Edit” to select a given user.  You will arrive at a screen similar to the following example.  After making your updates, click “Save.”  (See the following example).

Usermgr8

Examples of Access

The following page shows the access of the site administrator (admin).  The user in this role has the most access; all Role boxes are checked, so he/she has the permissions to change all the modules in the website.

Usermgr9

Here is an example of a user that has minimal or basic access.

Usermgr10


System Configuration

The System Configuration feature allows the user to manage the color RGB and the character encoding settings, as well as set the website online or offline for maintenance.   This module is typically managed by a company’s System Administrator.

System1

If you click the red-highlighted “system configuration” on the Dashboard, you land on the following module.

System2

This module contains information regarding the Color RGB number, Site Name and Character Encoding number.  On Site Online, there is a drop-down that has the following options:

System3

As with other modules in CMS, if changes are made, click “Save.”  To return to the Dashboard, click “Dashboard.”

Role Manager

The purpose of role management is to manage authorization, which enables you to specify the areas that users of your company’s website are allowed to edit.  Please keep in mind that your company’s role structure and role names may differ from the examples presented in the following pages.

The User Roles module can be accessed one of two ways:

Role1

(1)       The Dashboard – click on the Role Manager button.  (See the following screenshot).

(2)       The Administration Tab – click on the tab, mouse-over the Configuration/Settings button, then slide down the menu to “Role Management” and click.  (See the following example).

Role2

Whichever access method you choose will land you on the following module.

Role3

The Site Administrator

The Site Administrator is the “Parent” at the highest level within the structure represented in the above example.  Therefore, he/she would be automatically granted all the privileges (or Rights) given to the child roles.

Next, we will review the ‘Update Role ‘Site Administrator’ module.  To open that module, you would click the “Edit” button on that line.  (See the examples provided on the following pages).

Role4

Notice that the Site Administrator has no Parent Role selected. In the Right Codes listing, functions are listed that represent various task sets.  “Right” means that the System Administrator has the privilege to access most of these resources and perform related functions.

Role5

The Web Master

You will note that the Update Role ‘Web Master’ is very similar to the Site Administrator form, in that most of the Right Codes have been check-marked.  However, in the Parent Role drop-down, “Site Administrator” has been selected as the parent role.

Role6

Role7

Roles that are parented by the Web Master:

  • Education Content Manager
  • Events Manager
  • Exhibition Manager
  • Promotion Manager
  • Support Group Manager
  • User Manager/Group Manager

Note: While the only example included is for Education Content Manager, the other role types in the above list have nearly identical ‘Update Role’ Modules

Roles that are parented by the Promotion Manager:

  • Promotion Manager – Live
  • Promotion Manager – Stage

Note: While the only example included is for ‘Promotion Manager – Live,’ please understand that ‘Promotion Manager – Stage’ has a nearly identical ‘Update Role’ Module.

Role10

Roles that are parented by the Support Group Manager:

  • Asian Arts Council
  • Men’s Art Council

Note: While the only example included is for ‘Asian Arts council’ please understand that ‘Men’s Art Council’ has a nearly identical ‘Update Role’ Module

Role11

How to Create a New Role

On the User Roles module Click “+ Add Role.” You will open the following module:

Role12

The following is a fictitious role created for learning purposes.

After completing all information, you would click “Save.” (or if you change your mind, click “Cancel.”)

Role13

After you have clicked “Save”, the following updated User Roles module is created: (See the new Role marked with a red checkmark.)

Role14

In this instance, the Parent is the Education Content Manager, and the “child” is the new role, “Test: Fictitious Content Coordinator.”


How to Edit a Role

Using the most recently created “Test: Fictitious Content Coordinator,” click “Edit”.

After making desired changes (in this instance, see red arrows for items edited), click “Save”.

Role15

This newly-revised User Role module will appear.  (Note the edited role highlighted in yellow).

Role16

How to Delete a Role

Let’s delete our test case.  Go to the red “X” on the same line as the test case.  You will get the following screen:

Role8

Click “OK.”  If you change your mind, you may click “Cancel.”

Press Releases

The press release module allows you to manage your corporate message with timed press releases that can be scheduled for inclusion on the site at a specific time.   Press releases are automatically added to the press release display widget which automatically categorizes them for display in either chronological order or by content category.

To access Press Releases, click on “Press Releases” on the Dashboard (outlined in red in this example).

Press1

This will open the “Press Release” Module (See the following example):

Press2

  • On the “Press Release” Module (see previous example), click “Add Press Release” button.
  • You will be presented with the following screen.

Press3

  • Press Release Title – Enter the title
  • Short Summary – Enter a brief summary describing the subject of the press release.
  • Release Date – Click on the “Release Date” cell.  A calendar pop-up will become available.  Select date.
  • To add the file, click “Add PDF File” button, select the file, then the “Start Upload” Button. (Tip: If you change your mind, this is the time to click “Cancel upload.”
  • Click “Create” button.

 How to Edit a Press Release

  • Click “Edit” for the press release you need to change.
  • The “Update Press Release 52” module will open. (Note:  Each release will have a different number. The example is Number 52).
  • After making necessary changes, click “Save”.
  • To delete a press release, click the red “X” next to the file you need to delete.

Press4

Promotion Manager

The purpose of promotion manager is to “promote” all edits to the publicly-accessed version of your company’s website.  There are  three different environments or levels:

  • Alpha – this is the “rough draft” of the website. The changes within your content have not been finalized yet; they are not ready to be released on the front end, or the public part of your website.
  • Staging – During staging, the content is being further refined, but still is not ready for view by the public on the front end.
  • Production – When the content has been edited, proofread and reviewed by the proper management in your company, it is ready for promotion to Production. 

The following module (used for demonstration purposes) is in Alpha format.  The statement “THIS STATEMENT HAS BEEN INSERTED FOR DEMONSTRATION PURPOSES” has been added to the Home Page.  As you can see, since this page was still in the Alpha environment, the Current Status is “Unpublished.” (see below).

Promomgr1

The Promotion Manager module can be accessed by clicking “Promotion Manager” on the Dashboard.

Promomgr2

You will land upon the following module.

Promomgr3

How to Promote Content from Alpha to Staging

The Environment Selection box allows you to switch between environments by using the radio buttons.

Within this section is a box that contains the Alpha Pages Pending.  The number “16” represents a breakdown of the various types of content that is sitting in Alpha waiting to be promoted to Staging.

Promomgr4

The box entitled “Items Pending Promotion to Staging” is where you would select the new content that you want to be advanced to Staging.

To select all content, click the box next to the “Alpha”.  On the following module, you will see what happens when you have selected the content.

Promomgr5

A green checkmark appears in the boxes on the above list.

To promote the check-marked content to staging, click the “Promote” button (outlined in red on above screenshot).  The following module will be presented.  The “0” means that there is no content in Alpha; the message should say “Promotion is Complete.” (See red arrow.)

Promomgr6

How to Promote Content from Staging to Production

To access the following module, go to the Dashboard, “Promotion Manager.”

As you will see, the Environment Selection box has radio buttons for “Alpha to Staging” and “Staging to Production.”  Click on “Staging to Production.”

Promomgr7

In the “Items Pending Promotion to Production,” click staging.  Check marks will be inserted for all three check boxes (See example below).

Next, click the “Promote” button

Promomgr8

The following module will be presented.  The statement “Promotion is Complete” shows in this module to confirm the promotion of staging content to production.

Promomgr9

To check to see if your changes have been made on the Front end, or Production environment, click the Dashboard button.  Click on the Phoenix Art Museum logo (Please note that your own company’s logo will appear on your website).  This will take you to the home page of the front-end of the website.

Please note that the Current Status now reads “Published” on the Administration module.

Promomgr10


Page Manager

Page Manager allows you to create new pages, add images and select layouts from various templates.  Widgets are available for ease of editing.  Meta Data modules contain URL and other relevant information about each page.

The Page Manager can be accesses two ways:

  1. By clicking the Page Manager button on the Dashboard
  2. By clicking the Administration tab.

Pagemgr1

When clicking the Administration Tab, mouse-over Page Manager.  You will be presented with the following options:

 Pagemgr2

Using Page Manager from the Dashboard or the Administration Tab

If using Page Manager from the Dashboard, click Page Manager.  It will take you directly to following screen. If using the Administration tab, mouse-over Page Manager and select “Create New Page.”

This numbered screenshot shows basic functions of Page Management.

Pagemgr3b

  1. Add New page
  2. Edit Existing Page
  3. Edit Meta Data
  4. Delete
  5. Browse by URL (Toggle button)
  6. Browse by Title (Toggle button)
  7. Go to other pages
  8. Return to Dashboard

More detail is provided in the following sections.

How to Add a New Page

You may either access “Create a New Page” from the Dashboard

Pagemgr4

Which lands you on Page Management, then click on “Add New Page.”

Pagemgr5

Or you may use the Administration tab.

Pagemgr6

Both options will land you upon the following page:

Pagemgr7

  1. Enter Internal Name (This appears on the Page Management module)
  2. Enter public page title (Keep in mind that this is the one that the public will see)
  3. Enter primary URL
  4. Select a template for the layout you want to use
  5. Click “Create Page.”
  6. The cancel button is used if you change your mind during the process of adding the page.

The following example shows a new page just created.

Pagemgr8 

How to Edit a Page

From the Page Management screen (see example below), locate the document you want to change. In this example, we are using “Book a Program.”  There are two ways to do this to locate the page:    (a) You may either use the “Browse by url” button; this also toggles to enable you to “Browse by Page”, (b) On the bottom of the page, use the “Go to Page” function.

To edit an existing page, click the “Edit” button on the “Book a program page” line.

Pagemgr9

A screen similar to the following example will open up.

Pagemgr10

If you mouse over either of the two widgets, you will see the following:

 Pagemgr11

Editing a Page using the Administration Tab

If you click on the Administration tab, you’ll see the listing of buttons.  If you mouse-over the Page Manager button, a sub-menu lists available options (see below):

Pagemgr14

Click “Browse All Pages” and you will land upon the Page Management Page, where you can browse for your page until you find it.  Then you would click “Edit.”


Editing a Page via Top Navigation and the Administration Tab

One of the most useful features of the Administration tab is that you are given the ability to edit a page and access widgets for each page.  If click on “Collection” on top navigation, you get a drop down menu (see example). Select “Collection” tab and drop down to “American.”

Pagemgr13

The following page opens up.  The next step would be to click the Administration Tab.

Pagemgr15

You will notice that new buttons appear on the Administration Tab menu; one to “Edit Page” and another to access “Meta-data.”

Pagemgr16

 How To Edit Page Using Administration Tab

Click “Edit Page” (outlined in red on this example):

Pagemgr17

Widgets for the American page become available.  (You can identify a widget by the dotted lines around each one).  If you mouse over the images of the paintings, you will see “Edit Collection.”

Pagemgr18

If you click the “Edit Collection,” you will be presented with the following new page:

Pagemgr19

As you can see, you have several button options on this page.   To return to the American Collection page, click “Close.”

Next, click on the American page widget; you get the following module.  It gives you the capability to change the layout.  To return to American Collection Page, click “cancel.”

Pagemgr20

How to Access Meta Data

The Meta-data page can be accessed by clicking the button outlined in red:

Pagemgr21

This contains all the URL information and other details about the American Collections page.

Pagemgr22