Reports

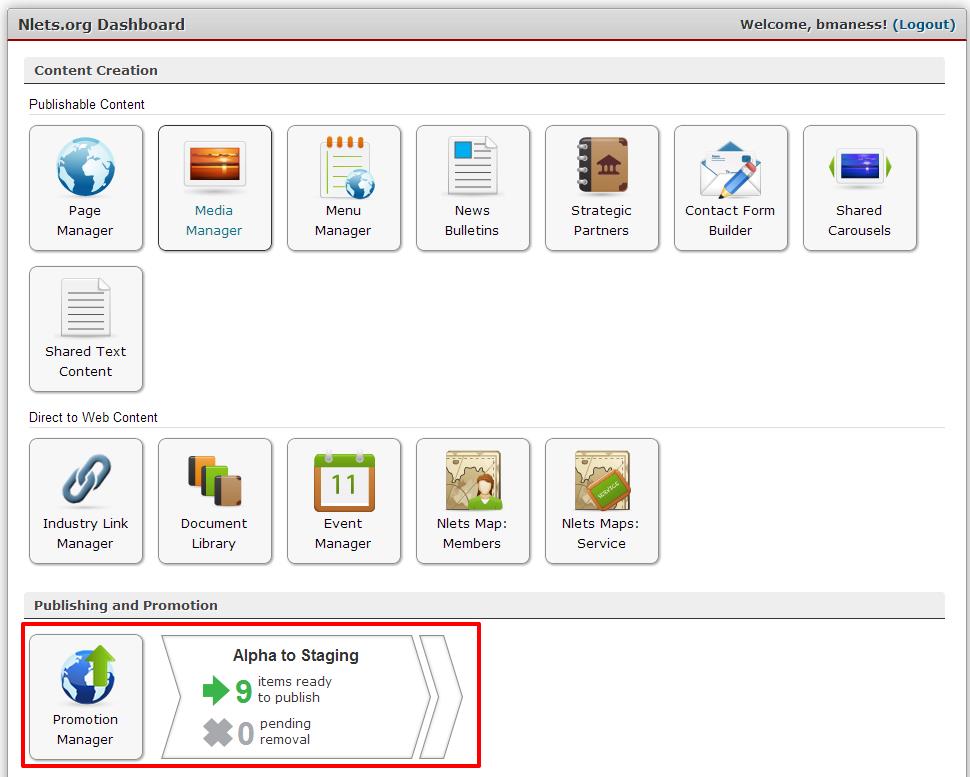
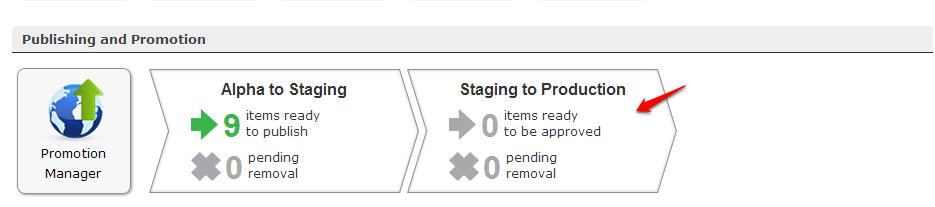
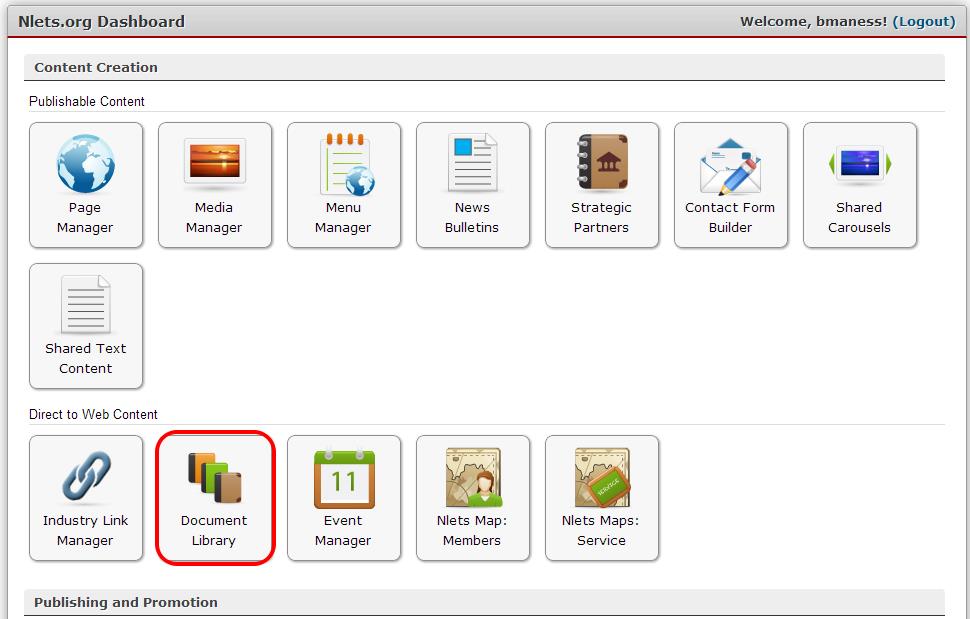
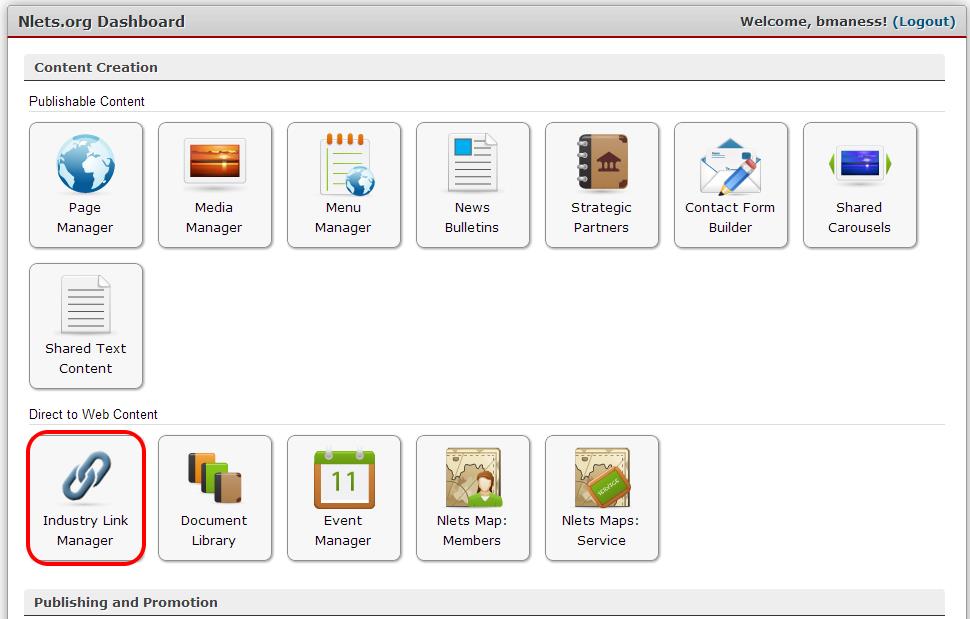
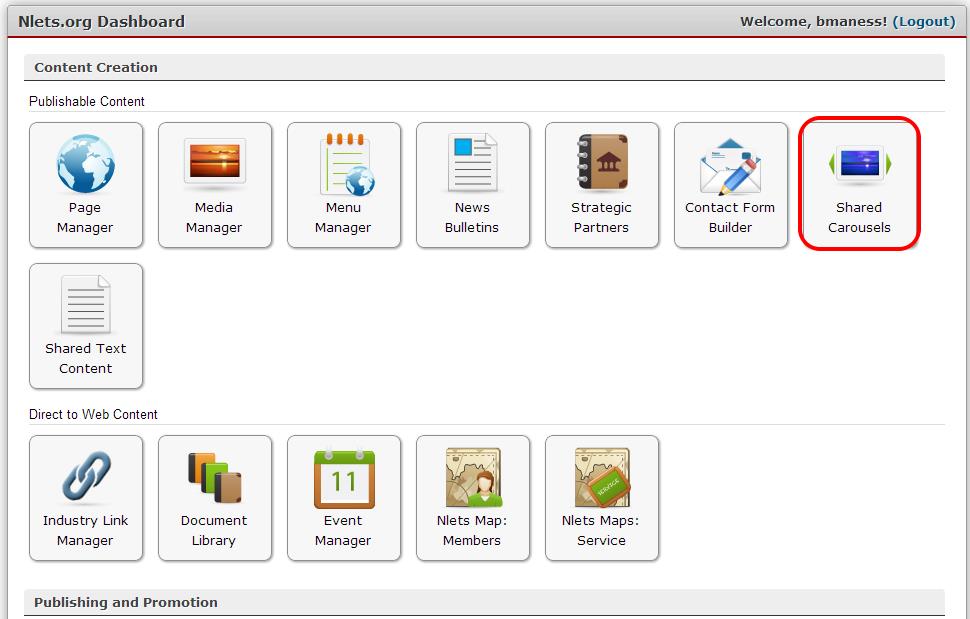
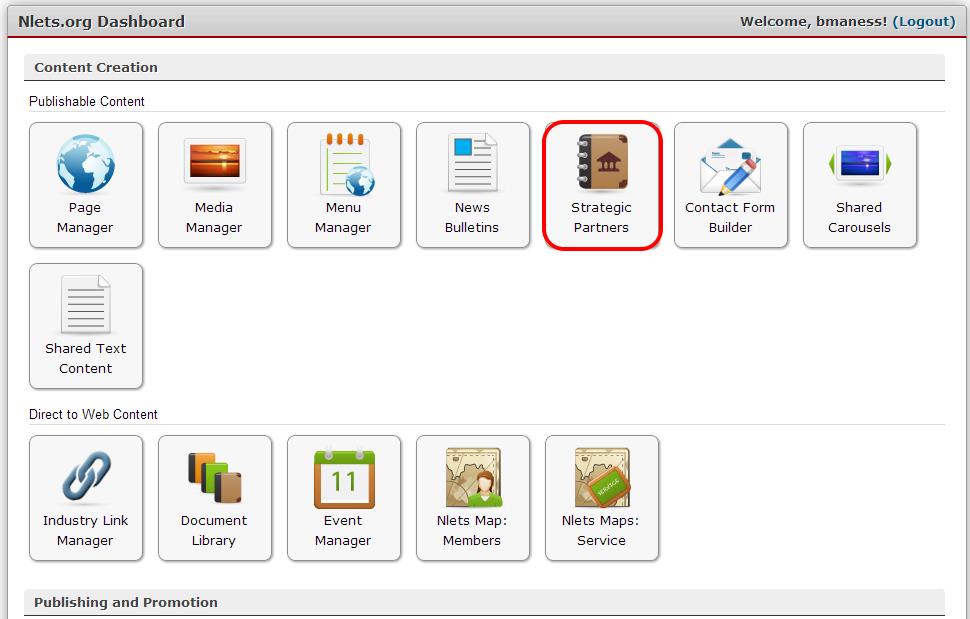
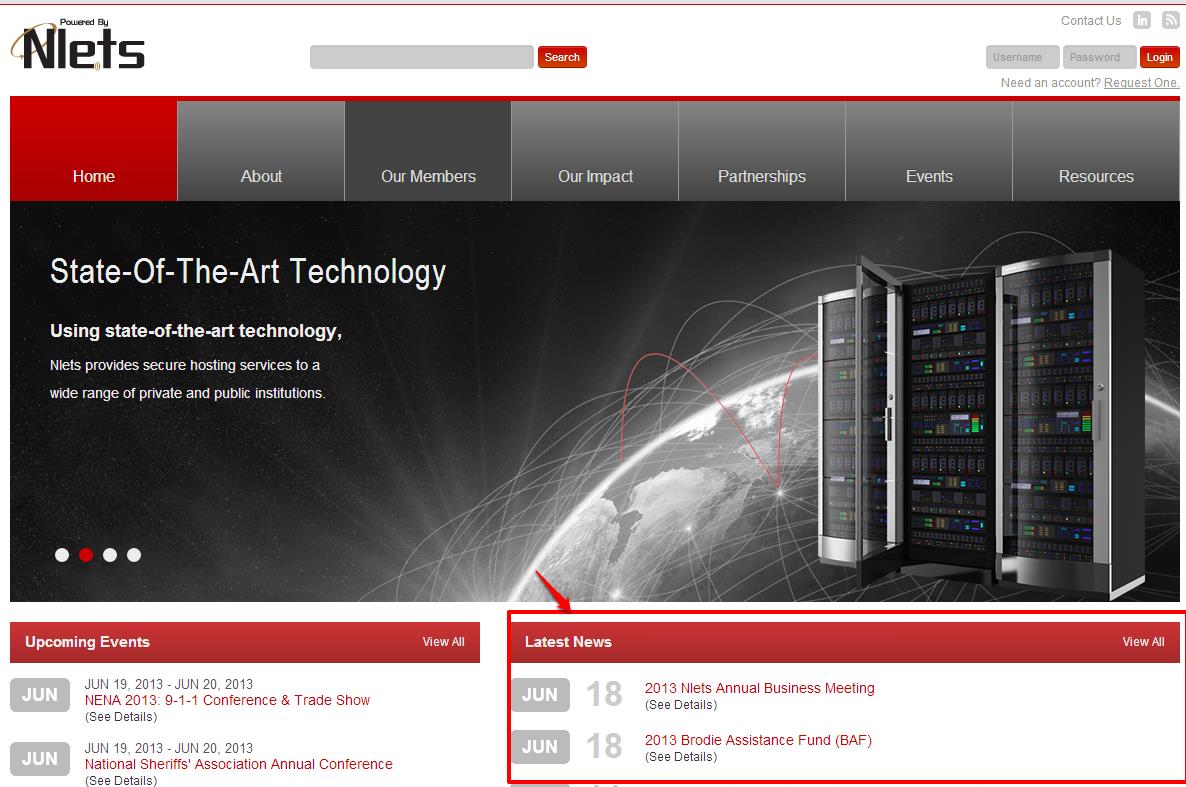
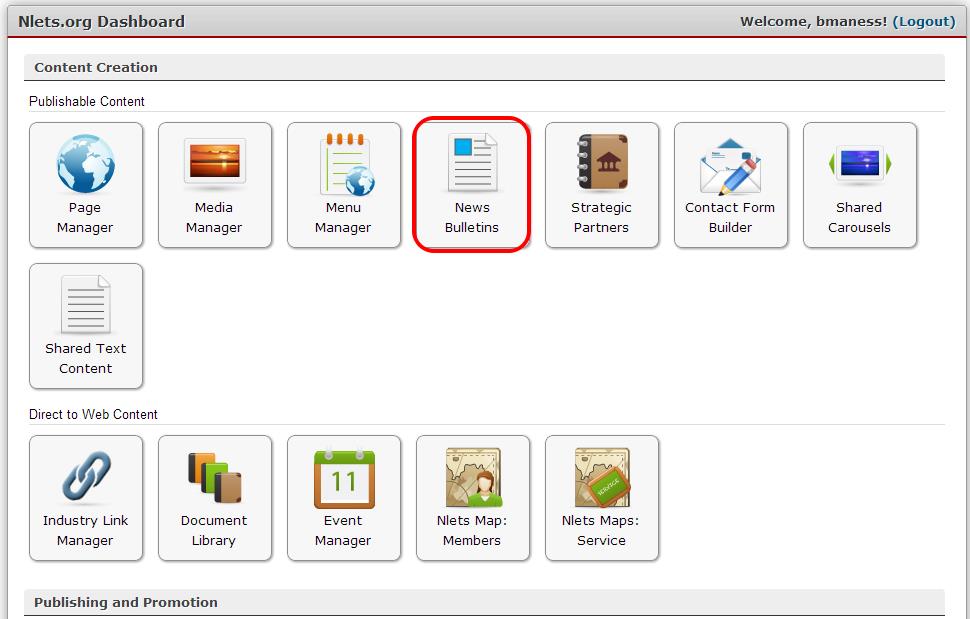
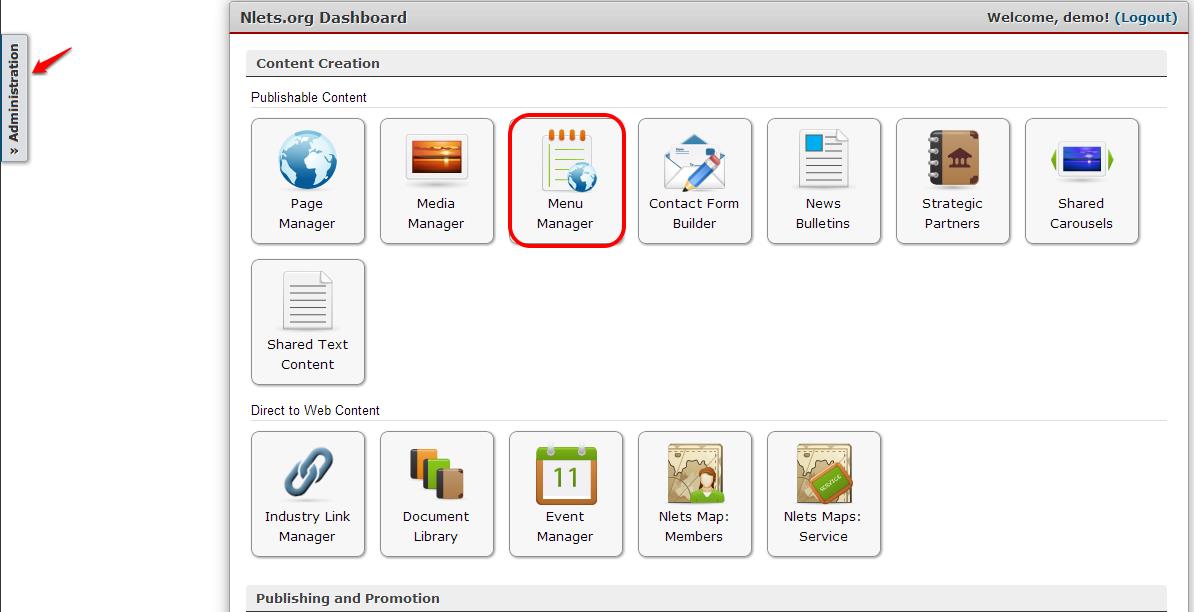
The “Reports” section of the Nlets Dashboard makes frequently-used forms and reports readily available for download (area outlined with the red box in the following example).

Report1

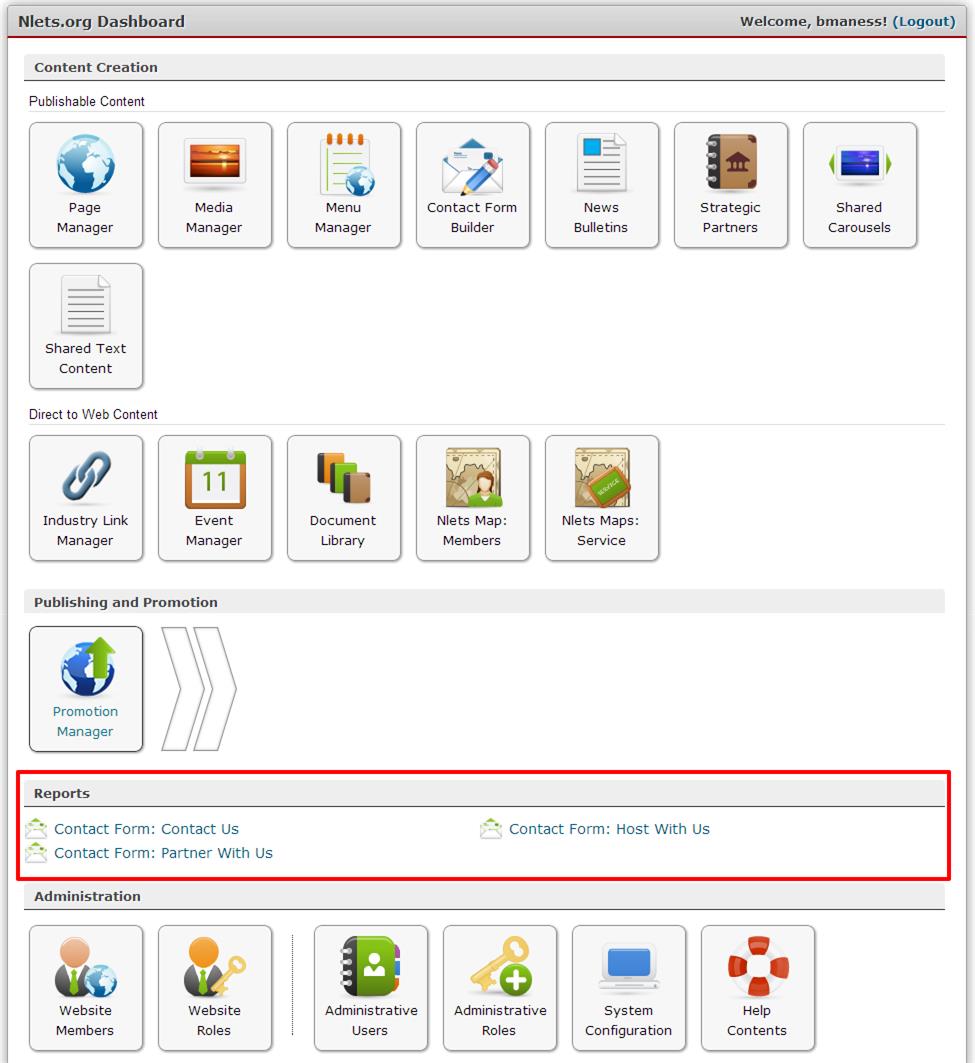
There is a built-in function in C2MS that automatically adds these links to the reports area on the Dashboard each time a new form or report is created in the Contact Module.


Website Roles

This feature allows you to set up website roles.  It enables you to designate the resources that users of  Nlets website are allowed to access. Please keep in mind that your company’s role structure and role names may differ from the examples presented in this document.

Click the “Website Roles” button on the Administration section of the Dashboard.

WR1

You land upon the following module.

WR2

To add a new Website Role, click “+ Add Website Role.”  The following module becomes available:

WR3

Enter the Role Title and click “Create.”

WR5

As you can see on the next example, “Member: Wiki Editor” has been added to the Role Titles.

WR6

To Edit a role, click “Edit” on the item you need to edit.  To Delete a role, click the red “X.”

Website Members

Nlets’ website contains a specialized module which allows your designated Nlets administrator to manage authorization of Nlets website members. This enables you to designate the website resources that users of your company’s website are allowed to access. Please keep in mind that your company’s role structure and role names may differ from the examples presented in the following pages.

This module can be accessed on the “Administration” section of your Nlets Dashboard.

WM1


Clicking “Website Members” takes you to the Website Members module:

WM2


Note the tabs across the top of the module.  By clicking these tabs, you can view Active, Pending, Not Verified, Cancelled and All listings.  You may also search by clicking “Keyword” button.

To Add a new Website Member, click “+ Add Website Member.”  You will land upon the following form.

WM4


To create a member, please note that all information marked with a red asterisk (*) must be entered.  When you are finished, click “Create.”


To edit an existing member, click “Edit” on the Website Members module.  A completed form (It is like the example on the previous page, only it will say “Update Member”) will open up.  After you have made your change, click “Save.”

To delete an existing member, use the red “X” on the Website Members module.


Promotion Manager: Nlets

The purpose of Promotion Manager is to publish content additions and changes made on the back-end of Nlets’ website to the front end of Nlets’ website. There is a specialized feature available on Nlets’ Dashboard – Promotion Notifications (See the area boxed in red in the following example).

PMNlets1

The right-arrow shaped icons contain the promotion notifications. “Alpha to Staging” is the environment in view in this example; the green “9” tells you that nine items are ready to publish.

By mousing-over the third (blank) arrow, you will see the the second environment, “Staging to Production:”

PMNlets2

Since the “Staging to Production” environment has no number updates, it remains closed until it becomes active.

If you double-click “Promotion Manager” button (above), you are presented with the following module.

PMNlets3

To promote your content from Alpha Staging to Production:

  1. On “Items Pending Production to Staging,” click in the box next to “Alpha” on the listing.  The boxes will become populated with green checkmarks.
  2. In the Environment Section, click the radio button next to “Staging to Production.”
  3. Finally, click the “Promote” button.

Document Library

The purpose of the document library is to make various documents, presentations and meeting notes available  for viewing by designated groups of users.

The document library is accessed through the dashboard (see below).

DL1

When you click on the Document Library button, you land upon the following module:

DL2

To add to the Document Library, refer to the Document Library module (see previous page), Click on “+ Add Document.” You will land on this page:

dl3

  1. Click  “Upload Document” first.
  2. You will notice that the document name will automatically populate both the Uploaded Filename cell and the Document Name Cell.
  3. Next, enter your Document Description.  This may be the title of the document.
  4. Document Categories – This is optional.
  5. Permitted Roles – Check the appropriate role.
  6. Click “Create” to save/add the document.

To add a New Document Category, from the Document Library module, click “Document Categories.”

DL4

You will land upon the following module.  To add a new category, click “+ Add Document Category.”

DL5

You will be presented with the following screen.  Enter the Category Name in the cell provided and click “Create.”

DL6

To edit an existing category, click “Edit” on the same line as the category.  You will be presented with a screen entitled “Update Document Category.”  Make your change and click “Save.”


Industry Link Manager

Industry Links appear on the front-end Nlets website on Resources/Industry Links (see example below).

ILM1

To access Industry Links, go to the Dashboard and click “Industry Links.”

ILM2

You will land upon the Industry Link Manager (see example):

ILM3

To add a new Hyperlink, click “+ Add Hyperlink.”   The “Create a Hyperlink” module will open up.

ILM4

Enter the date (if appropriate) and URL.  Select Category, if desired.  Click “Create.”

To edit an Industry Link, click on “Edit” (see below):

ILM5

When you have finished editing, click “Save.”

ILM6


Shared Carousels

The Nlets website has the Shared Carousel function.  It can be accessed on the dashboard by clicking “Shared Carousels.”  (See below):

SC1

You are presented with the Shared Carousel module (see example below).

How to Add Images to an Existing Carousel

From the Dashboard, click “Carousel Manager.”  You will land on the following screen:

SC2

Next, Click “Edit.”  You will land on the  “Carousel Slides” screen.

SC3

Click “+ Add Slide.”  You will land upon the following module:

SC4

Enter the Slide Name in the cell provided.  Next, enter a description in the text box.  Finally, upload an image.  (Tip:  make sure the photo meets the requirements spelled out on the above module).  The last step is to click “Create.”

How to Add a Carousel

Click the “+ Add Carousel” button.

SC5

You will land upon the following module.

SC6


Enter a name for the Carousel and click “Create”.

Strategic Partners

Strategic Partners are published on the front end, “Partnerships/Strategic Partners” webpage. (See example below):

SP1

The Strategic Partners module can be accessed by clicking “Strategic Partners” on the Nlets Dashboard:

SP2

You will land upon the following page:

SP3

To add a Strategic Partner, click “+ Add Strategic Partner.”  You will land upon the following page:

SP4

As you can see, the company’s name, description and logo upload must be completed in order to create a new Strategic Partner.   Click “Create” when finished.

To edit a Strategic Partner, go to the Update Strategic Partners page. Click “Edit”; you will get the “Update Strategic Partner” Page.

SP5


sp6

Once you have made necessary changes, click “Save.”


News Bulletins

News Bulletins are published on the front-end home page (See the following example):

nb1

The News Bulletins module will be part of your Nlets dashboard. (See the following example):

nb2

How to Add a News Post

Click “News Bulletins” on your Nlets dashboard.  You will land on the following screen.

nb3

To add a News Post, click  “+ Add News Post” button.

When the “Create a News Post” screen opens up (See next page) you will note that the current date is already in the “Date” cell.

  1. When the “Create a News Post” screen opens up (See next page) you will note that the current date is already in the “Date” cell
  2. In the “Headline” cell, enter your headline
  3. Upload an Image – Click this button if an image is required. You are presented with another screen, where you may upload and crop your image.   Note that the image can be previewed once it is uploaded.  (See where the screen says “Show Preview.”)
  4. Article – Insert your text.  Note: this box automatically converts your text to HTML format.
  5. Excerpt – This is generated automatically from the first sentence of your article.
  6. Tags – Type in cell to add these, if desired.
  7. Add New Attachment – Click button to add, if desired.
  8. When finished, click “Create.”

nb4

See the newly-added “Example of a News Post” entry line below.

nb5

How to Edit an Existing Post

Click on “Edit” next to the item you wish to change.

To delete an existing post, click the red “X”.


Menu Manager

The purpose of the Menu Manager is to present you with the capability to edit the top navigation components on the front-end of your Nlets website (see below):

MM1


You may access Menu Manager either on the Dashboard by clicking the Menu Manager button or on the Administration sidebar.

MM2


Here is what you see when you click the Administration Sidebar.

mm3


Either option will lead you to the Website Menu Manager module (see example below):

MM4


To Add a Category, click “+ Add Category.”

MM5


Clicking “Create” brings you to this module.

MM.jpg8


When several categories have been added, the green arrows are used to move the order among the other categories (note that in this example, sub-categories Baz and Foo have been added).

MM8


To edit a category, click “Edit.”  To Delete a category, click the red “X.